How to Dye Pasta and Rice

How to Dye Pasta and Rice

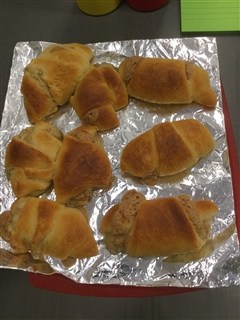
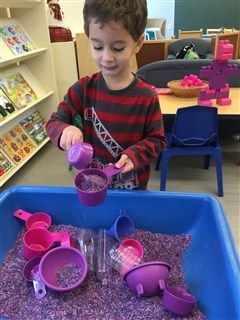
A five-step recipe for dying pasta in every color of the rainbow for craft projects, jewelry, and more.

Ingredients and Supplies

  • Uncooked pasta or rice
  • Food coloring or icing gels
  • Vinegar
  • Plastic containers with lids or Zip-loc bags
  • Newspaper or paper plates
  • Cookie sheet


Instructions

  1. Place the pasta or rice in container or Ziploc bag (up to two cups).
  2. In a small bowl, mix together 1 tsp of vinegar with a generous dab of icing gel or 1/2 of a small bottle of food coloring.
  3. Pour the vinegar/icing gel mix over the pasta or rice and seal the container.
  4. Shake vigorously, until the pasta is well coated. (Hint: purple pasta must always be done twice.)
  5. Pour the pasta out in a single layer onto a cookie sheet covered with newspaper or paper plates and let dry. 

Matching Letters – Hearts

Matching Letters - Hearts

Materials

Construction paper
Sharpie marker
Scissors
Stickers (optional)

Directions

Choose a simple shape to cut out of construction paper. We used hearts for Valentine’s Day.   Cut several of that same shape. Write upper case letters on half of the shapes and the matching lower case letters on the other half of the shapes. Invite your child to make pairs by matching the upper case letters with the lower case letters. Continue playing until all letters have been matched. Change out the letters and continue playing if your child remains interested.

Extension activities:

  • For very young children, use stickers and invite your child to match stickers.
  • Place a sticker on half of the shapes. Write the beginning letter sound of each sticker  on the other half of the shapes. Match the correct letter to the sound heard at the beginning of each picture.
  • Write sight words on the shapes (e.g. the, in, and, etc.). Encourage your child to match  sight words and read them as he places the matching circles together.
  • Invite your child to place the letters in alphabetical order, or use number symbols and  place them in numerical order.

Counting and Numeral Recognition – Bubble Wrap Jumping

Counting and Numeral Recognition - Bubble Wrap Jumping

Materials

Roll of bubble wrap (approximately 6 feet long)
Large construction paper shapes with a numeral written on each shape (we used heart shapes)
Packing tape
Permanent marker
Scissors

Directions

Securely tape bubble wrap to the floor or carpet. Cut out construction paper shapes. Write numerals on shapes and tape them to the bubble wrap, one numeral per shape. Place the shapes in numerical order to encourage younger children to practice counting, or place numerals in random order to encourage numeral recognition. Invite your child to jump on the numerals, saying the name of each one. 

This is a great activity that gets your child moving and jumping.  They love the popping sound that they make with their feet!

Matching Patterned and Colored Hearts

Materials

Foam hearts of various colors or patterns 
Strip of poster board
Permanent marker
Basket or container for hearts

Directions

Using a permanent marker, draw a small grid with two columns and 6-8 rows on the strip of poster board.  Place pairs of colored and/or patterned hearts in a small basket or plastic container.  Invite your child to find pairs of hearts and place them next to each other on the grid. Once all of the hearts have been paired and placed on the grid, count the pairs.

To adapt for the activity for younger children, glue or stick one of each color heart on the left column and invite your child to choose one heart at a time and match it to a heart on the grid by placing it next to the heart. Continue until all the hearts have been paired. Encourage your child to count as you touch each pair of hearts.

Water Play with Pink and Lavender

Water Play with Pink and Lavender

Materials

Large plastic tub or container for water (not too deep!)
Various pink and lavender objects

Directions

Place water in a large plastic container. Add the pink and lavendr objects to the water. Invite your child to explore and practice pouring. Introduce new vocabulary words such as sink, float, top, bottom.  Which objects sink to the bottom?  Which objects float on top of the water?

Marble Painting

Marble paint

Materials

Solid box with lid (pizza box works well)
Construction paper
2-4 marbles
Tempera paint (we used blue and yellow)
Small bowls or containers for paint
1 spoon for each color of paint
Glitter (optional)

Directions

Kid with Imo's pizza box
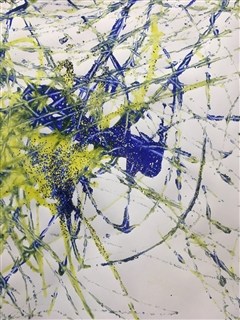
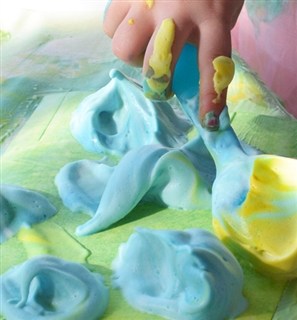
Pour paint into the bowls. Place 1-2 marbles in each color paint. Lay a piece of construction paper on the bottom of the box. Using a spoon, drop 1-2 marbles from one of the colors of paint into the box and close the lid. Invite your child to shake the box vigorously. Open the box and place the marbles back in the paint. Next, drop 1-2 marbles from the yellow paint into the box and shake. What happens when the yellow and blue paints mix? Continue the process until your child is satisfied with the painting. 

Optional: While the paint is wet, sprinkle a little glitter on the painting to give it some sparkle! 

Delicious Banana and Peanut Butter Croissants

Ingredients

1 tube of Pillsbury Crescent Rolls
Peanut butter
Banana
Small plate
Fork
Table knife
Cookie sheet

Directionskid with a fork

Place 1/3 of the banana on a small plate and invite your child to mash it wiith a fork. Unroll the crescent roll dough and pull apart into triangular sections.  Ask your child to spread peanut butter onto the large end of the triangular dough.  Next, invite your child to use the fork to place the mashed banana on top of the peanut butter and then roll the dough into the shape of a crescent (nice vocabulary word!). Place the rolls onto a cookie sheet and bake as directed.

What a delicious, tasty snack

Counting on to 10 (or 20)

Two kids counting to ten

Materials

Duplos
1 Die

Directions

Take turns rolling the die.  After rolling the die, count the number of dots on the die. Count out the number of Duplos to match the number of dots on the die.  Stack the Duplos by pressing them together. Continue taking turns rolling the die and adding the correct number of Duplos to the stack. The first player to get to 10 Duplos wins. Continue playing until your child loses interest.

Lesson Extension

For preschoolers, provide two dice.  Players roll both dice at the same time, add the dots, count out the same number of Duplos, and then stack them on top of each other. The first player to reach 20 wins.

Painting with Shaving Cream

painting with shaving cream

Inspired by Leo Lionni’s book, Little Blue and Little Yellow

Materials

Book:  Little Blue and Little Yellow, by Leo Lionni
1 can shaving cream
Blue and yellow food coloring
2 small bowls
2 spoons
Large white construction paper or finger paint paint

Directions

Read the story about Little Blue and Little Yellow with your toddler or preschooler.  Then let them know that they are going to make Little Blue and Little Yellow using shaving cream.

Squirt shaving cream into each bowl.  Invite your child to place several drops of yellow food coloring into one bowl of shaving cream and several drops of blue food coloring into the other bowl of shaving cream.  Encourage your child to use a spoon to mix the colors into the shaving cream.  Once mixed, invite your child to place some of each color of shaving cream onto the paper.  Observe what happens as your child explores and begins to mix hte colors.  What new color was created?  Reinforce, “When yellow and blue mix together, they make green!”

Allow the shaving cream to dry before displaying.  This activity can also be done right on top of a formica table top, counter, or in the tub!