Purple Cow Shakes

Ingredients
1 small scoop of vanilla ice cream
2 Tablespoons of grape juice concentrate
2 Tablesppons of milk
Small jar with lid
Red and blue food coloring

Directions
Help your child place a small scoop of vanilla ice cream into a jar.  Measure 2 tablespoons of grape juice concentrate and 2 tablespoons of milk.  Add to the ice cream. Invite your child to add 2 drops of blue and 1 drop of red food coloring into the mixture. Screw the lid on tightly and shake!  What happens to the ice cream?  What color is the shake?  Pour into a small cup and enjoy!

Purple Pretzel Monster Cookies

Ingredients
Pretzel sticks broken into small pieces (approximately 1 inch in size)
1 package of Wilton Candy Melts in Lavender (can be purchased at Michael’s)
1 package of Wilton Candy Eyeballs (can be purchased at Michael’s)

Directions
Melt candy melts as directed.  In a large mixing bowl, pour melted candy over pretzel bits.  Stir with a spoon until all pretzels are coated.  Drop by spoonfuls onto cookie sheet covered in non-stick foil or parchment paper.  Add candy eyeballs.  Allow monster cookies to harden. Serve.

Promoting Sensory Play

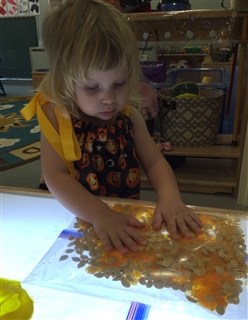
Sensory activities provide children with a meaningful avenue for learning by facilitating exploration and naturally encouraging children to use scientific processes while they play, create, investigate, and explore. From infancy, children have learned about the world around them by touching, tasting, smelling, seeing, and hearing. Because children learn best by having “hands on” experiences with materials, sensory experiences are vital to young children’s learning. 

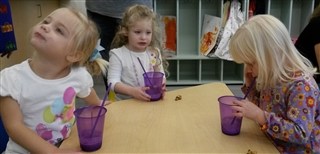
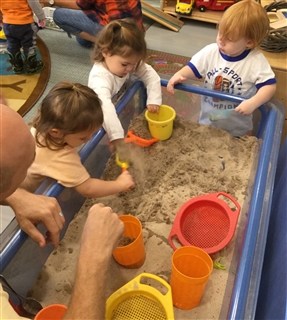
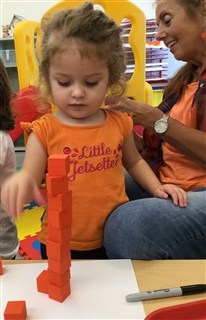
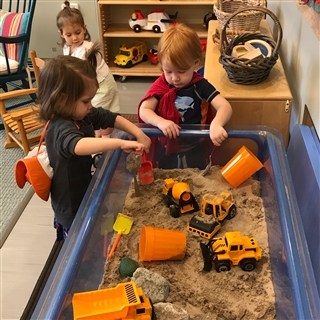
Learning and retention improve when our senses are engaged. As children experiment with different sized containers in cornmeal or sand, they develop math skills such as size, conservation, counting, timing (how long it takes the sand to sift verses dirt), matching (finding the objects that match the chart or matching buttons, etc.), and classifying and sorting. As children manipulate the materials, they learn to understand concepts such as more/less, full/empty, and sink/float. Science concepts such as cause and effect, gravity, and solid to liquid can also explored. 

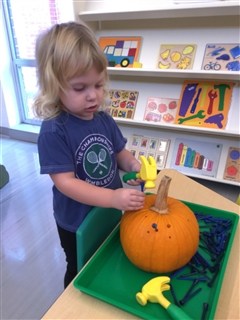
Even before children can speak, they are developing an understanding of things in their environment by actively exploring them with all their senses. As they become more verbal, children can describe similarities and differences in what they see, hear, taste, touch, and smell. Children develop pre-writing skills as they pour, spoon, grasp, and work on eye-hand coordination tasks as they use the materials. 

Self-discovery occurs as children become eager scientists. They practice making predictions, observations, and respond to their findings. In addition, children learn to cooperate and work together around a sensory table. As the children work together or side-by-side, they learn to understand someone else’s viewpoint. The children also have the opportunity to express themselves and become confident in sharing their ideas with others. 

Children reinforce and practice their small motor skills while pouring, measuring, stirring, whisking, and manipulating the materials. They learn to control their movements and give their bodies directions to accomplish tasks as they explore. Gross motor skills are refined as children run through the sprinkler, paint with large paint brushes on the side of the building, and explore various mediums with their feet. 

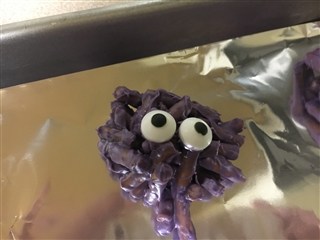
Sensory experiences provide open-ended opportunities where the process is more important than the product. Howchildren use the materials is much more important than what they make with them. Using creative thinking skills and expressing one’s creativity are important skills to nurture. Providing sensory experiences in a comfortable, accommodating environment can offer infants, toddlers, and preschool-age children lots of new, exciting, and beneficial opportunities. Taking into consideration children’s individual needs can really make them feel at ease and allow children to follow their interests!

Suggested Sensory Materials and Supplies

Mediums
Water
Sand
Dirt
Cornmeal
Rice
Macaroni
Soybeans
Sawdust
Dried Beans
Fingerpaint with additives (sand, glycerin, sawdust)
Fingerpaint in sealed plastic bags
Shaving Cream
Playdough
Confetti
Putty
Whipped Cream
Foam Pieces

Materials
Basters
Whisks
Waterwheels
Ice cubes (add food coloring)
Tongs
Sponges
Seashells
Soap Flakes
Cooking Utensils (measuring cups, funnels, spoons, etc.)
Combs
Vehicles
Funnels and sifters
Different kinds of bowls and containers
Cardboard tubes
Buttons
Dishwashing detergent
Rocks
Squeeze bottles
Buckets and pails

Building Block Towers

Materials
Blocks (we used square orange blocks)
Flat surface

Directions
Place blocks onto a hard surface. Encourage your child to build towers with the blocks.  How high can you build a tower?  How many blocks were used? What made for a successful tall tower? Introduce words such as balance, vertical, bottom, top, tall, tallest.  Count the blocks.

Color Mixing – Red and Yellow

Materials
Red and yellow tempera paint
Zip-loc Baggie (1 or 2 gallon-size)
Clear duct tape 

Directions
Pour a small amount of red and yellow tempera paints into a large Zip-loc baggie. Close and reinforce all sides with clear duct tape. Invite your child to use his fingers to mix the two colors together.  What new color did your child make? Encourage your child to make lines, circles, letters, words, etc. in the paint.

Exploring Pumpkin Pulp and Seeds

Materials
Pumpkin
Scoop
Knife
Seeds and pulp from a pumpkin
Large Zip-loc Baggie
Magnifying glass (optional)

Directions
Cut the top off of the pumpkin and scoop out the insides.  Invite your child to help with the scooping if she doesn’t mind touching the pulp.  Place some of the pulp and seeds in a gallon-size Zip-loc bag and close. Allow your child to explore the seeds and pulp through the baggie. We placed our baggie on the light table, but any hard surface will work. Provide a magnifying glass for closer observation. What words can be used to describe the pulp and seeds? Try counting the seeds, or separate the seeds from the pulp. Have fun exploring and observing!

Orange Construction Work in Sand

Materials
Sand table, box, or large container of sand
Construction vehicles – loader, backhoe, bulldozer, dump truck, etc.)
Shovels, buckets, construction cones
Rocks
Water

Directions
Place materials in the sand. Invite your child to explore in the sand, pretending to be a construction worker at a site. Add water to the sand as a new element to explore. Support your child’s learning by providing books about construction vehicles, construction sites, and the workers. 

Orange Creamsicle Poke Cake

Ingredients

1 white cake mix
1 cup orange juice
1 – 6 ounce box of orange Jell-o
2 cups boiling water
1 – 3.4 ounce box instant vanilla pudding
1 cup milk
1 – 8 ounce container Cool Whip
Mandarin Oranges (optional)

Directions
Mix the cake mix according to the back of the box, but substitute orange juice in place of the water. Bake cake as directed. Remove from oven and poke holes all over the top with a fork. Your child will love poking holes! Dissolve the orange Jell-o in boiling water. Let cool 5 minutes. Invite your child to help you spoon all of the Jell-o over the top of the cake, making sure it goes in the holes. Cool completely in the refrigerator. Whisk together the vanilla pudding mix and milk. Fold in the Cool Whip. Spread over the top of the cooled cake. Cut into 24 pieces. Garnish with mandarin oranges, if desired. Store in a covered container in the refrigerator.
Enjoy!

Pounding Golf Tees into a Pumpkin

Materials
Small pumpkin
Child’s play hammer
Package of golf tees
Gallon size Ziploc bag for storing the activity
Sharpie Marker

Directions
Place the small pumpkin, a container of plastic golf tees, and a child’s play hammer onto a hard surface. Invite your child to hammer the “plastic nails” into the pumpkin. Encourage her to hold the tee with her fingers of one hand and use the hammer with the other hand. Your child will have fun pounding the tees into the pumpkin. Count the number of golf tees hammered into the pumpkin.
This activity works on the pincer grasp, which is needed for holding a pencil correctly, eye and hand coordination, and counting.