Kitchen Fun (3 months and up)

Materials
Sets of plastic measuring cups and measuring spoons

Directions
Place the cups and spoons on the floor around your baby. Observe as he reaches to grab the toys.  If his aim isn’t quite accurate yet, place the measuring spoons in his hand and encourage him to hold them. Most likely the spoons or cups will go right in his mouth since gumming and mouthing  objects is how babies learn about the world at this age. 

As your baby manipulates the cups and spoons by dropping them, picking them up, and placing them in his mouth, your baby learns about using his arms and hands. Exploring objects by mouth helps a baby learn about physical properties such as smooth, rough, cold, hard, heavy, and light. 

Pushing Game (6 months and up)

Materials
Bath towel

Directions
Place your baby on his tummy on a carpeted area. Using a rolled bath towel, give you baby a boost in moving forward by placing the towel or your hands at the end of his feet and let him push against them with his feet. Don’t push, but support his fet with your hands as he inches forward each time. Soon, your baby will be moving down the path toward greater mobility. 

This exercise helps strengthen your baby’s legs and gives him a taste of what it takes to get some forward motion. 

Roll Me Over

Movement Practice

Materials
Baby blanket

Directions
Place your baby on her stomach or back on one side of a towel or blanket and gently lift it a bit, so she rolls onto her side. Or, gently push her back and forth so she learns how to swing her weight correctly. You may need to help your baby lift her arm out of the way as she starts to roll. 

Learning how to roll over is usually preceded by several weeks of rocking from side to side. it’s generally not until a baby is about five months old that she is strong and coordinated enough to go from back to stomach or stomach to back.  This activity helps babies practice using both sides of their bodies which is required for this basic movement. 

Purple Crayon Playdough

Materials
3 purple crayons, shaved or chopped
3 cups flour
1 1/2 cups salt
2 Tablespoons Cream of Tarter
2 Tablesppons oil
Pan
Mixing bowl
2 cups water

Directions

In a large bowl, mix together the dry ingredients (3 cups flour, 1 1/2 cup salt, 2 Tbsp. cream of tartar)  Next, heat 2 tablespoons of oil in a pan. Add the chopped crayons. Stir until the crayons are completely melted. Slowly stir in 2 cups of water. Continue stirring until mixed. Add dry ingredients a little at a time. Continue stirring until all ingredients are mixed and dough has formed.  The dough will pull together in a ball over the heat. Once the dough has formed, remove from heat and dump playdough out onto a cutting board or counter. Let the dough cool slightly before kneading. Knead the dough until smooth. 

Babycycle (0-3 months)

A Body-Awareness Activity (0-3 months)

Place your baby on his back on a blanket on the carpet. Facing your baby, very gently and very slowly move his legs in a bicycling motion, all the while talking and smiling at him to encourage him to wiggle his legs without your help. By moving his legs for him, you let your baby feel his little legs and feet moving in a new way – each side of the body working in reciprocal movement. You also mimic an action he’ll be using later on as he learns to crawl.

Swat the Toy (3 months and up)

Eye-Hand Coordination, Visual Development, and Fine Motor Practice

Attach a small plush toy or teething ring to a brightly colored ribbon or plastic links. Place your baby on a blanket and dangle the toy in front of your baby – making it sway from side to side, and encouraging your child to reach across her body.  Praise her efforts as your baby reaches out and swipes at – or even grabs – the toy. Reaching for moving objects helps your baby fine-tune the coordination of both sides of her body. 

Extension Activity

Big Bouncing Ball

Using a brightly colored punchball (available at toy stores) or a beach ball with a colorful ribbon tied to it, lie your baby on his back and dangle the ball in front of him. Three- to six-month-olds can swat it with their hands, kick it with their feet, and eventually try to get both arms around it. This takes eye-hand and eye-foot coordination, as well as an understanding of just how far their arms and legs extend – all of which come from steady swatting and kicking practice. 

Harold and the Purple Crayon

Materials
Storybook:  Harold and the Purple Crayon by Crockett Johnson
Purple Crayon
Large White Construction Paper

Directions
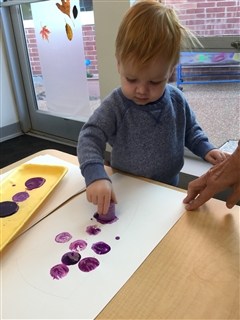
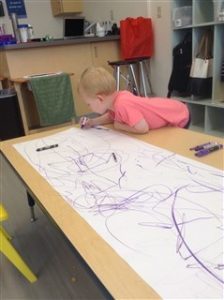
Read the story, Harold and the Purple Crayon by Crockett Johnson.  Provide large sheets of white construction paper and purple crayons.  Invite your child to draw and explore with a purple crayon.  Where does it take her?  What does she do?  What experiences does your child have with the purple crayon?  Have fun!

Read other stories about Harold and his purple crayon.  Like Harold, what other adventures does your child have with a purple crayon?

Jewel Drop

Materials
1 empty plastic bottle (Voss water bottles work well!)
Acrylic colored jewels
Small bowl or basket

Directions
Place 10 – 12 acrylic jewels into a small plastic bowl or basket.  We used purple jewels only during Purple week. Provide an empty plastic bottle.  Invite your child to pick up one jewel at a time using her pincer grasp (thumb and index finger) and drop the jewel into the plastic bottle.  Continue until your child loses interest.  Pour the jewels back into the bowl or basket.

This activity helps stengthen the pincer grasp which is needed for writing and practices eye and hand coordination.

Painting Purple Grapes

Materials
Corks for Crafts
White construction paper (9″x 12″)
Purple tempera paint
Paper plate
Green Marker
Purple glitter (optional)

Directions
With a pencil, lightly draw a simple triangular shape in the center of the white construction paper.  This will serve as a guide for your child to make purple dots inside. Pour a small amount of purple tempera paint onto a paper plate.  Using one of the larger corks, invite your child to dip the cork into the paint and press onto the white paper.  Once the triangular area is filled, help your child sprinkle a small amount of glitter (if desirous) and add a green stem to the top.  Dry completely before hanging.

Purple Circles Matching Game

Materials

Various shades of purple paint chips from a paint store
Large piece of white construction paper
Marker
Glue
Scissors


Directions
To prepare the activity, cut the paint chips into various size circles or rectangles, making sure to have matching pairs.  On the large piece of white construction paper, draw a grid with  – one line down the middle of the paper and several lines that go across the paper.  Glue one of each matching pair onto the left side of each section on the grid.  Place the other pieces in a small basket or container.

Invite your child to match each shape in the basket to the one on the grid.  Match all the pairs.