Rainbow Bundt Cake

Ingredients
White cake mix
Food coloring or paste
Eggs
Oil

Directions
Make cake as directed. Divide the batter into six small bowls.  Add food coloring or paste to each bowl in the colors of a rainbow. In a greased and floured bundt pan, pour the vaious colors of batter in layers. Bake as instructed. Allow to cool slightly before removing from pan. Enjoy!

Painting Rainbows with Marshmallows

Materials
Muffin tin
Tempera paints (red, orange, yellow, green, blue, purple)
White or light blue construction paper (9×12)
Large marshmallows
Pencil

Directions
Draw a rainbow shape with six sections onto the construction paper.  Pour one color of each of the tempera paints into each section of the muffin tin.  Place a large marshmallow in each of the muffin sections.  invite your child to dip a marshmallow into the tempera paint, starting with red, and make dots that follow the arch of the rainbow moving left to right across the page.  Work through all the colors.  Allow time to dry before hanging.

Fizzy Rainbows

Materials
Freeze colored water in plastic cups
Baking soda
Pipettes
Vinegar
Tray

Directions
Take frozen water cups out of the freezer. Place cups onto a tray. Invite your child to scoop approximately 1/4 cup of baking soda on top of the frozen water. Place the pipette into vinegar, squeeze the top, release so the vinegar gets sucked up into the pipette. Then squeeze the pipette over the vinegar and observe what happens.

Contact Paper Rainbow

Materials
Clear contact paper
Permanent marker
Craft tissue paper cut into 1-inch squares (rainbow colors)

Directions
On the non-sticky side of the contact paper, draw arcs to resemble a rainbow. Carefully pull the backing off and tape the contact paper to the table surface, sticky side up. Place one piece of tissue in each section to represent the color to be used for each arc. Invite your child to add colors to the contact paper. This is a good project to keep out and invite your child to continue adding to the rainbow a little bit at a time over a few days. Once all the arcs are covered with tissue, hang the rainbow contact paper up on a window for the light to shine through.

Caterpillar Color and Shape Sorting

Materials
Craft foam in various colors
Scissors
Painters tape
Markers
Large Googly eyes (optional)
Large piece of poster board to stick the calerpillar on

Directions
Use the inside of the roll of painters tape to trace one circle on each color of craft foam. Cut out the circles. Use the scraps to make additional shapes – small triangles, circles, squares, rectangles. Tape the circles onto the poster board to make a caterpillar shape. Add eyes- either hand drawn or googly eyes and antennas to the head. Invite your child to match the colors of the shapes to the color sections on the caterpillar. Review the names of the shapes and colors as the shapes are sorted.

Lesson Extensions for Preschoolers

  • Write upper case letters on the caterpillar circles and lower case letters on the various shapes. Match lower case to upper case letters.
  • Draw dots on the circles of the caterpillars; write numerals on the shapes. Match the numeral to the number of dots. 
  • Write numerals 5-10 on the circles of the caterpillars. Encourage your child to use addition skills to add two numbers together on the shapes that equal a numeral on the caterpillar

Butterfly Snacks

Materials
Snack size baggie
Clothes pins
Small goggly eyes
Pipe Cleaners
Goldfish crackers
Grapes
Glue

Directions
Glue the small googly eyes onto the clip end part of the clothes pins. in one half of the baggie, place goldfish crackers, and on the other end, place a few grapes.  Close the baggie and clip the clothes pin in the center of the baggie. Cut a pipe cleaner in half and clip onto the clothes pins to look like antennas. 

Your child will delight in these fun special snacks!

Tickling Textures

Materials
A variety of materials with different textures (e.g. nubby carpet remnants, sticky contact paper, bubble wrap)

Directions
As your baby begins to scoot and crawl, try laying rugs, blankets, or items with different textures on the floor for your child to explore as he travels across them.  Also, carry your baby around and help him feel the textures of different surfaces, such as a cool brick wall, a tree trunk, or grass. 

Pastel Tissue Collage

Materials
Small pieces of colored tissue in pastel colors
Clear, sturdy plastic (We ran plastic from the laminating machine and cut it into squares. You can also use clear sheet protectors from an office-supply store or clear plastic fabric protectant from a fabric store)
Decoupage glue (Mod Podge—found at a craft store)
Paintbrush

Directions
Cover the work space with newspaper. Place a piece of plastic on the table. Put some Mod Podge in a small bowl and place a small amount of tissue cut in small squares or shapes in another bowl or basket. Invite your child to paint the plastic with the Mod Podge and then place pieces of tissue on top.  It is helpful to reinforce the tissue with more Mod Podge. This may require a little help from an adult. It is also fun to layer and overlap some of the tissue to make new colors. Dry completely. 

Flower Petal Counting

Materials
Flower Petal Counting Sheet (you can easily make one on the computer or draw one by hand)
Flat floral marbles

Directions
Place floral marbles in a small bowl or basket. Invite your toddler to use the marbles to make petals around the colored circles.  Count the marbles.

For preschool-age children, write a different numeral in the center of each circle. Invite your preschooler to place the correct number of petals on each flower. Ask, “Which flower has the most petals?” “Which flower has the least?” “How many more petals does the blue flower have than the yellow flower?”  “What if I add two petals to the pink flower? Now how many petals does it have?” The questions are endless and really help strengthen number sense.

Tube Tracks

Materials
Self-grip hair curlers (or you can tape toilet paper cardboard tubes to a wall)
Pompoms, Ping Pong balls, marbles
Felt board or large piece of felt material secured to the wall

Directions
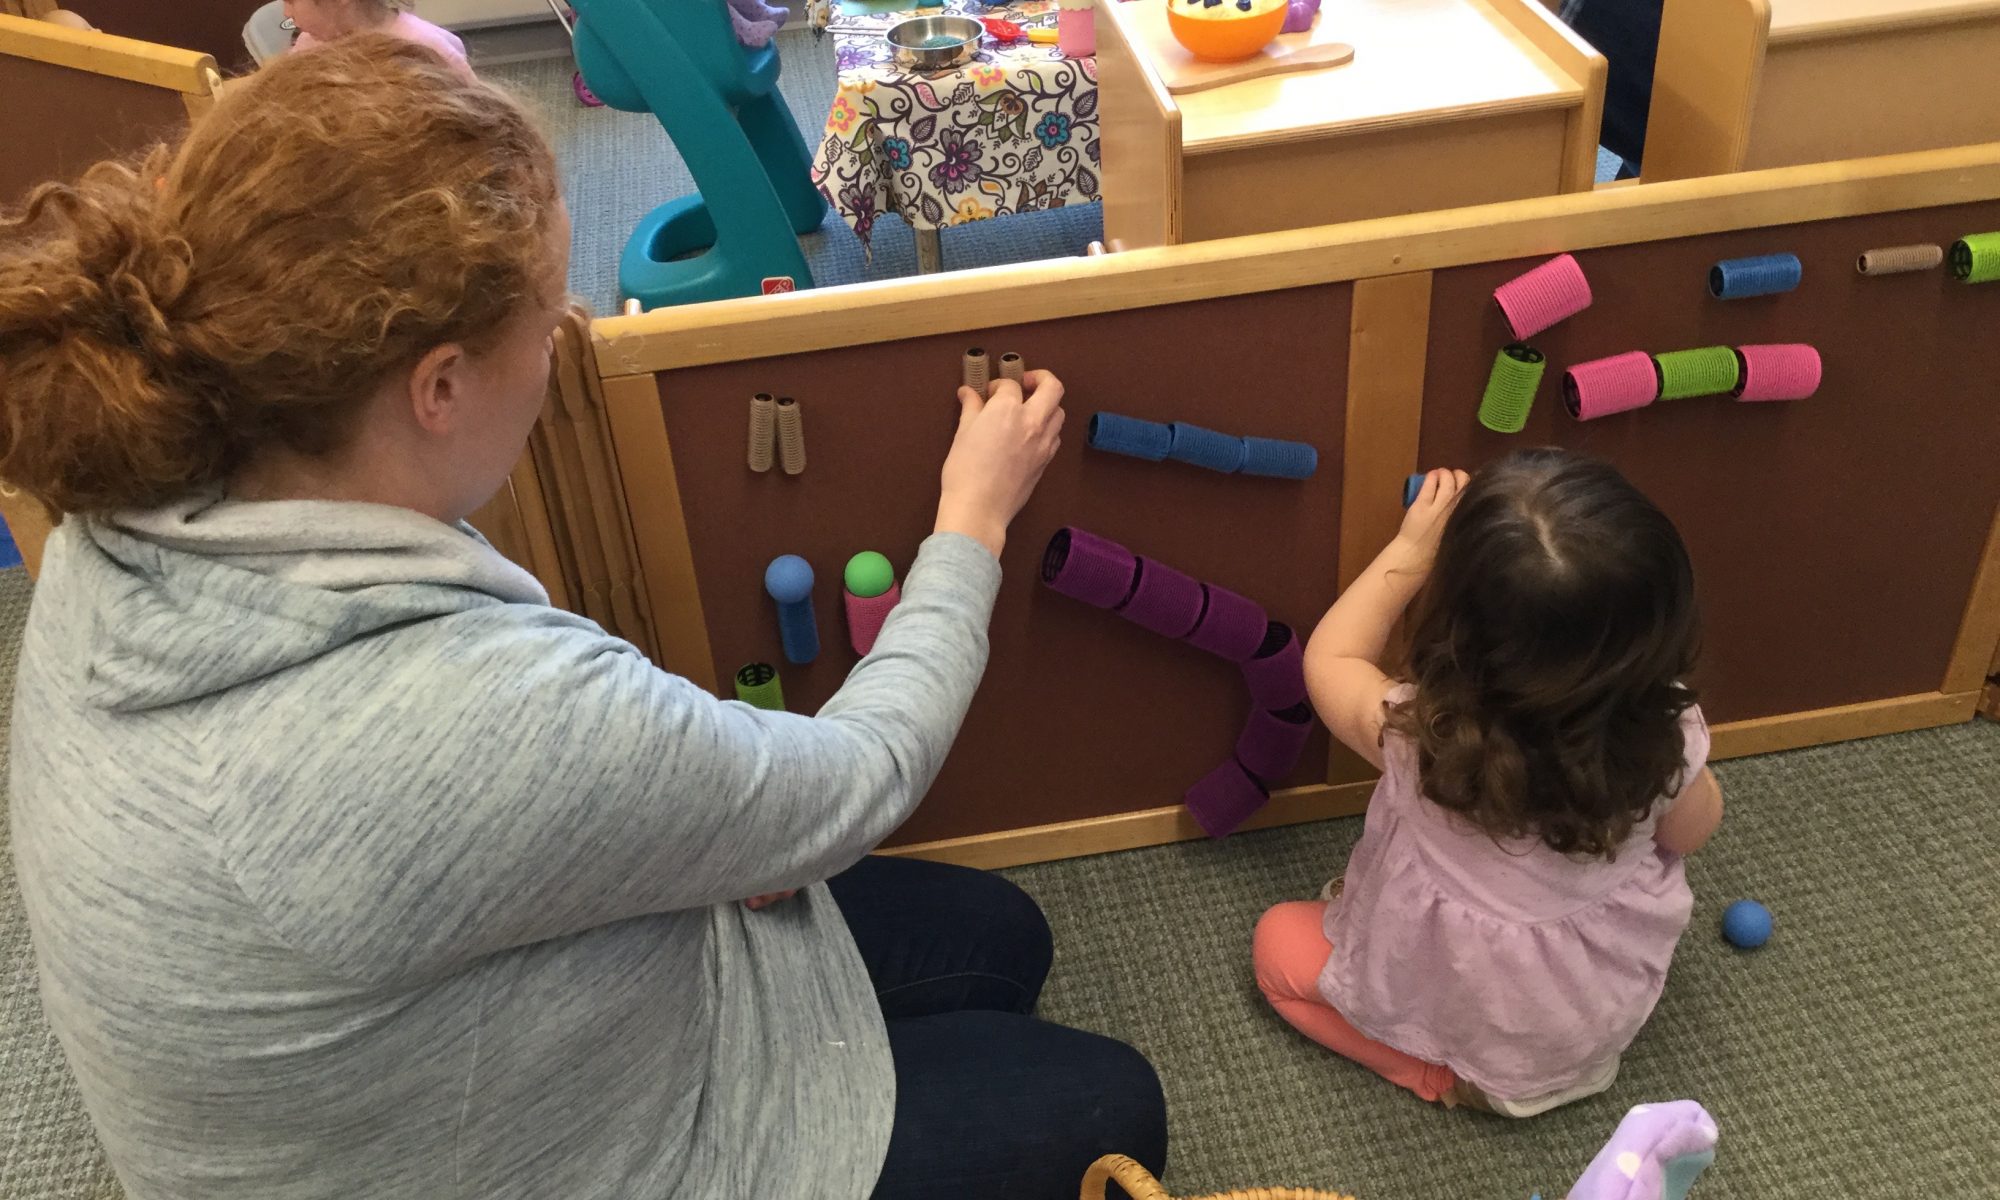
Invite your child to help you create some tracks using the curlers or cardboard tubes by attaching them to a felt surface or wall. The fun experience with using curlers is they can easily be moved around to make new tracks and pathways. Once the track is ready, invite your child to roll pompoms, ping pong balls, marbles or any other rolling object through the tubes. Was the rolling object successful in getting through all the tubes? If not, can your child solve the problem?

This activity allows children to be creative, to problem solve, to make predictions, and use visual discrimination