Sandal Painting


Materials
Washable paint 
Paintbrushes
Sandals, Crocs, and/or flip-flops
Butcher paper

Directions
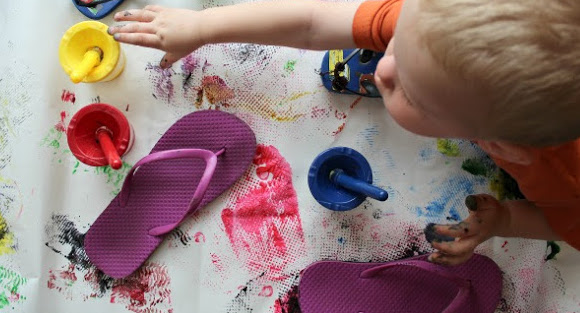
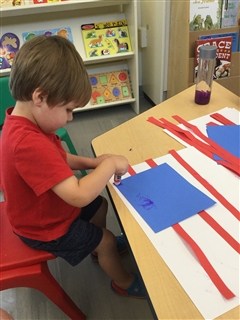
Invite your child to choose a sandal or flip-flop that he or they would like to use to make prints. Encourage using a paintbrush to paint the bottom of a shoe and then press it onto the butcher paper. The soles of the sandals have such interesting patterns and textures, which makes them fun to paint and stamp on the butcher paper!

When done in a small group, this activity is a wonderful cooperative art project, as children negotiate paint colors, navigate around each other, and swap sandals. 

Process art, such as this, is more about collaborating and making the art rather than the outcome. Process art gives children the freedom to explore, experiment, and enjoy the activity without preconceived notions about how it is “supposed” to look. 
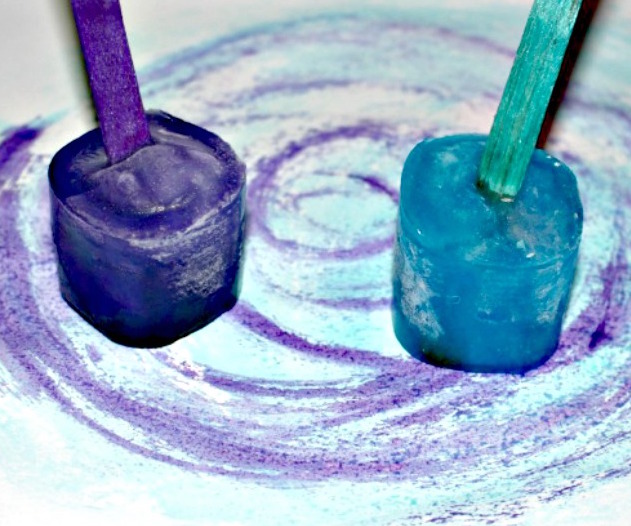


Abstract Window Art

Materials
Colored Transparency Sheets (can sometimes be purchased at the Dollar Store)
Scissors
Paper Trimmer (optional)
Shallow tray with water

Directions
Cut the transparency sheets into various sizes using scissors and a paper trimmer. Once the shapes are cut out, invite your child to dip the various pieces of colored transparencies into water and press them to the window where the sun can shine through.  Layering the colors is a great opportunity for discussing color mixing, as the layered sheets create different colors.

This activity is also a great way to work on fine motor skills.

So Big!

Active Infant Game

Hold your baby on your lap, facing you, or place him sitting or lying down on a blanket facing you. Ask: How big is (child’s name)? Then lift his arms up into the air and say: Sooooo big! 

Babies love this game and will eventually learn to lift their arms in response to your question.

Red, White, and Blue Jell-O Stars

Ingredients

2 x 3-ounce boxes of “Berry Blue” Jell-O
2 x 3-ounce boxes of cherry-flavored Jell-O
1 x 1-ounce box of Knox gelatin (4 envelopes)
14 ounces sweetened condensed milk

Directions

Spray a 9 x 13 dish with cooking spray. Set aside.

To make first layer: Pour Berry Blue Jell-O mixes, 1 envelope of Knox gelatin, and 2 cups of HOT water into a large bowl. Mix to combine. CAREFULLY pour mixture into dish. Place dish into refrigerator until set. Approximately 20–30 minutes.

To make second layer: Into a large bowl pour 2 envelopes of gelatin, 3/4 cup HOT water, 1/4 cup COLD water. Mix to combine. Into a separate bowl add: sweetened condensed milk and 1 cup HOT water. Mix to combine. CAREFULLY pour milk mixture into gelatin mixture. Mix to combine. SLOWLY pour white layer on top of BLUE layer. Return to refrigerator to set up, approximately 20–30 minutes.

To make third layer: into a large bowl pour cherry Jell-O mixes, 1 envelope of Knox gelatin, and 2 cups of HOT water. Mix to combine. CAREFULLY pour mixture into dish. Place dish into refrigerator until set, approximately 20-30 minutes.

Once final layer is set, use a star cookie cutter to cut into stars. (Or, if you prefer, simply cut into squares).

Making Patriotic Flags

Materials
12×18 white construction paper
Red construction paper cut into 1×18 strips
Blue construction paper cut into rectangles (3×6)
Small white die-cut stars
Glue sticks
Picture of the U.S. flag

FlagsDirections
Introduce your child to our country’s flag. Talk about the stripes, the pattern with the stripes, white stars, and the “blue field”. At the table, provide a container of stars, blue rectangles, red strips of paper, the large piece of white construction paper, and a glue stick. Invite your child to glue the red strips, white stars, and blue rectangle onto the large piece of construction paper.  For younger children, don’t worry about placement of the stripes, stars, and blue rectangle. Just allow them to create. Older children may be encouraged to replicate the flag as much as possible. Display.

Dish Wand Painting

Materials

Tempera paint (We used pinks and lavenders.)
Paper plates
Construction paper (We traced a large heart shape onto the construction paper.)
Sponge dish wands – one for each color paint (can be purchased at a Dollar Store)

Directions

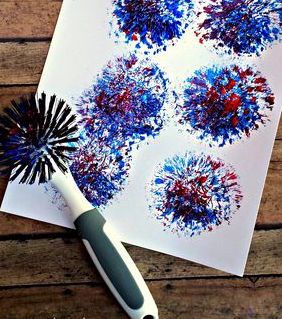
Cover your work space with newspaper. Pour tempera paint onto paper plates, one color per plate. Invite your child to dip the dish wand into the tempera paint and then paint with it on the paper. Some children like to tap the brush to the paper; some rub the brush on the paper. Allow your child to explore and observe how he uses the brush. The Acorn children painted on hearts traced onto the paper, which we then cut out after they dried. Display the beautiful art creation.

Patriotic Slime

Ingredients:
1/2 Cup of Elmer’s Washable PVA Clear Glue or White Glue 
1/4 Cup of Liquid Starch
1/2 Cup of Water
Food coloring, confetti, glitter, and other fun mix-ins in red, white, and blue

Directions:
In a small bowl, mix 1/2 cup Elmer’s Washable Clear Glue with 1/2 cup of water.  Add any mix-ins or food coloring (glitter, red, white and blue sequins, confetti stars, etc. ) Mix well. Add 1/4 cup liquid starch and stir.  Once the slime thickens and pulls away from the sides of the bowl, knead it. 

This is a fun science  and sensory activity.  Store in airtight container.  If the slime gets sticky, add a small amount of liquid starch. 

Taste Safe Ice Painting

Materials
Small yogurt cups or paper cups
Gel Food Coloring
Water
Craft sticks
Cardstock

Directions
To make taste safe ice paint begin by filling small yogurt cups or paper cups with water.  Mix a small amount of gel food coloring into the water.  Put a craft stick into each cup and then put the cups into the freezer. Freeze completely.

Once the ice has frozen take the ice paints out of the cups and allow your little one to get painting. 
TIP: If you are struggling to get the ice paint sticks out of the cups run them under warm water.

S’Mores Rice Krispies Treats

Ingredients
1/4 cup butter
4 cups of miniature marshmallows
5 cups of Rice Krispie cereal
1 package chocolate chips

Directions
  1. Melt butter in large sauce pan over low heat. Add marshmallows and stir until melted and well-blended. 
  2. Add cereal. Stir until well coated.
  3. Stir in package of chocolate chips.
  4. Using buttered spatula or waxed paper, press mixture evenly and firmly in buttered 13 x 9 inch pan. Cut into 2 x 2 inch squares when cool.


Bugs, Frogs, and Nature Sensory Tub

Materials
Dirt to cover bottom of a plastic tub
Small plastic bowl for a pond
Plastic insects and frogs
Small rocks, twigs, leaves
Spoons

Directions
Fill the tub with dirt, water in the bowl for the pond, plastic insects, frogs, twigs, rocks, and leaves. Provide a few spoons and invite your child to explore and feel different textures. Introduce new vocabulary.