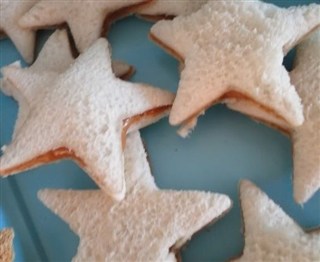
Star-Shaped Mini Sandwiches

Ingredients

Loaf of bread
Favorite sandwich makings (Our Acorn friends enjoyed peanut butter and jelly.)
Star-shaped cookie cutter

Directions

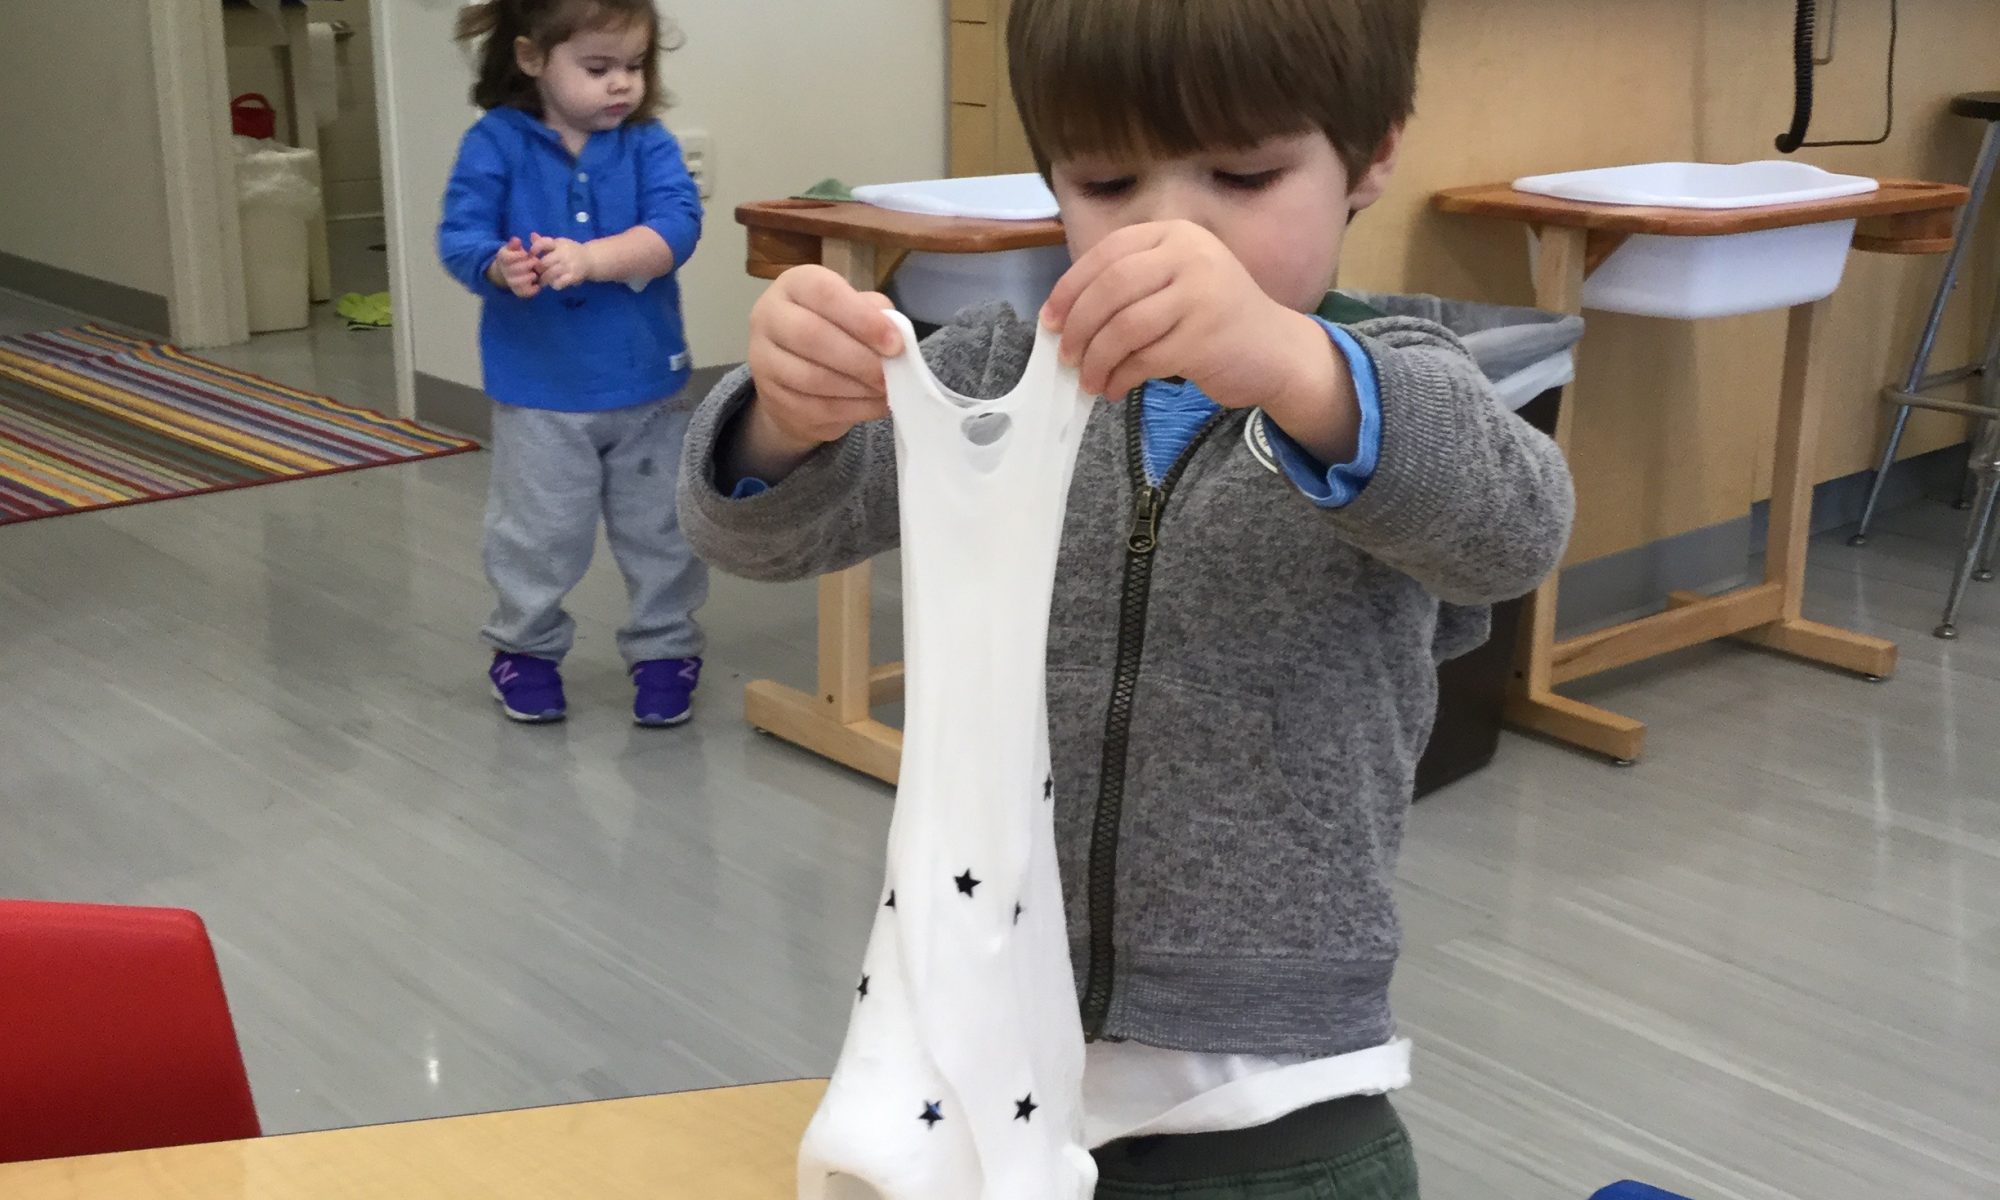
Invite your child to help cut several star shapes out of bread. Help him spread an even layer of jelly on half of the stars and an even layer of peanut butter on the other half of the stars.

Gently place a jelly star on top of a peanut butter star to make a peanut butter and jelly sandwich. Continue until all jelly stars are matched with peanut butter stars.  

Enjoy as a special snack or for lunch. Add other star-shaped food to your plate (e.g. watermelon, cheese, jello jigglers).

Making Sensory Bottles

Sensory bottles are so easy to create.  The possibilities are endless when it comes to additions.  All you need are a few plastic bottles, a hot glue gun to secure the lid, and a few of the items below.


Mylar strips
Beads
Small plastic straw pieces
Sequins
Glitter

Add water to the bottle.  Then place a small amount of glue from a glue gun inside the lid of the bottle and screw the lid on tightly.

To make a dry sensory bottle add any of the following

Colored rice
Dry pasta
Beans
Split peas
Toys
Sand
Feathers
Beads
Tinsel
 
The ideas are endless and the children love them!

Sparkly Star Slime

Ingredients

4 ounce bottle of Elmer’s Clear School Glue
Bottle of saline solution
Bowl
Star glitter or star confetti

Directions

Pour the whole bottle of glue into a medium-sized bowl.  Add 1 tablespoon of saline solution and mix.  

Once the slime forms, place slime on a hard surface and knead with your hands.  If slime is sticky, add a little more saline solution (1/2 tablespoon).

Add glitter stars for a fun effect.

Star Printing

Materials
Star-shaped cookie cutters
Tempera paint – white
Black construction paper
Paper plate with paper towel

Glitter (optional)

Directions
Lay a double layer of paper towel on a paper plate. Pour tempera paint onto the paper towel.

Invite your child to choose a star-shaped cookie cutter and dip it into the paint. Decorate the paper with white stars.  

For added sparkle, sprinkle silver glitter onto the wet paint. Allow painting to dry before displaying.

Sing “Twinkle, Twinkle Little Star.”

Marshmallow Slime with Black Stars

Ingredients
1 bag mini marshmallows
2 tbsp coconut oil, plus additional for mixing
1/2 cup corn starch, plus additional for mixing
1/2 cup powdered sugar, plus additional for mixing
Food coloring (optional)
Black glitter stars

Directions
Place marshmallows and coconut oil in a large pot and heat over medium heat. Stir continuously until melted. (You can do a microwaved version of this as well.)

Once melted, pour your marshmallow melt into a mixing bowl and add in corn starch and powdered sugar. Mix with your hands. Note: this will get STICKY! To help with this, coat them in coconut oil. (As the slime cools, invite your child to help with the mixing.)

Transfer the mixture onto a cornstarch coated surface, and continue to knead and mix until the “right” slime consistency is reached. It should be stretchable and not sticky. Keep adding corn starch, powdered sugar, and coconut oil until you feel happy with your texture.

Add stars and knead. Have fun rolling, stretching and playing with your slime!

Giant Bubble Solution

Ingredients
12 cups warm water
1 cup cornstarch
2 tablespoons baking powder
1 cup Dawn dish detergent
1 tablespoon glycerin (can be purchased at Michael’s in the cake decorating aisle)

Directions
Put half the water in a bucket and vigorously stir in the cornstarch until it’s dissolved. Mix in the rest of the water and baking powder until it’s all combined.  Add the soap and glycerin to the water mixture. Stir slowly with a big spoon so that you don’t make suds or foam in the bucket.

Let the bubble solution sit for an hour or more before using. Stir it gently for at least two minutes before making bubbles.  Stir the bubble solution every 10 or 15 minutes while you’re using it since the cornstarch and baking powder tend to settle at the bottom.

Use giant bubble wands to make giant bubbles.

Making Pipe-Cleaner Bubble Wands

Materials
Chenille pipe cleaners
Pony beads

Directions
Have your child decide small wands
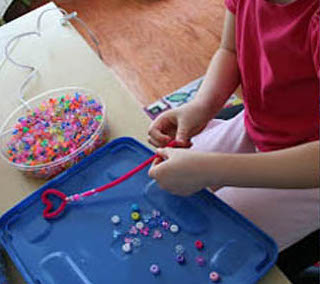
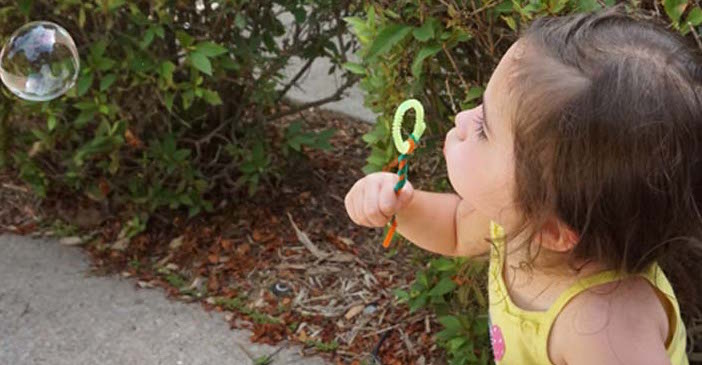
which shapes she wants to make the bubble wands—circles, hearts, ovals, etc. Form the shape at one end of the pipe cleaner, leaving a little extra bit to wrap around the body of the pipe cleaner in order to keep the shape. The bigger the shape, the bigger the bubbles.

adding beads smallNext, slide pony beads onto the pipe cleaner.  This is a great fine motor activity for your child. When all the beads are on the pipe cleaner, twist the end of the pipe cleaner to keep them from falling off.

Use the fun bubble wands for blowing bubbles. 

Bubble Chemistry

Materials
Liquid dish soap
Plastic spoons
Disposable cups
Measuring cups
Small pitcher of water
Rigatoni
Pipe cleaners

Directions
Invite your child to pour liquid dish soap into a spoon, and then pour it into a disposable cup.  Then measure out 1/4 cup of water and invite your child to pour it into the cup. Stir the mixture together.  Help your child form a wand by making a shape a the end of a pipe cleaner and giving it a few twists. Take the bubble solution  and pipe cleaner wands outside to test our bubble solution. You may also try blowing through dry rigatoni, just to experiment. Which one works better?  

Here’s a wonderful article written by Blakely Bundy and Diane E. Levin, published in NAEYC/Teaching Young Children:

Preschool Play Plans:  Bubbling Over with Fun!


Bubble Painting

Materials
Small plastic cups to hold the paint mixture
Tempera paint in a variety of colors
Liquid dish soap
Water
Straws
Push pin
Small pieces of card stock

Directions
Using the push pin, poke a hole into the straws so your child can’t drink the paint/bubble solution. The hole will still allow him to blow bubbles, but it will be much more difficult to suck up the solution. You can also do the activity with food coloring instead, if you’re uncomfortable using paint.

Pour a small amount of paint to the bottom of a plastic cup. Then add a squirt of dish soap and fill the cup with a couple inches of water.  The solution should be thin enough so that when your child blows bubbles into the liquid, the bubbles expand over the top of the container. Invite your child to gently blow through the straw to make bubbles. As the bubble begin to expand over the top of the cup, invite your child to lightly press a small piece of paper over the bubbles. The bubbles will leave an interesting print on the paper. Add a variety of colors of bubbles to one piece of paper. Your child will enjoy looking at how the colors mix together on the paper.

Ivory Soap Explosion

Materials
Bar of Ivory soap
Microwave
Towel or paper plate
 
Directions

Cut the bar of Ivory soap in half. DO NOT put the entire bar of Ivory soap in the microwave at once unless you want a huge mess! Cut the halves in half to make four quarters of the soap. Place 1/4  piece of the soap bar onto a paper plate and heat it in the microwave for 1-2 mins.

 
WATCH what happens! The reaction happens quickly so watch it & stop the microwave when appropriate. Remove the plate and allow your child to explore the soap. You may want to move the soap explosion to a tray or plastic container. Heat the remaining bars, 1/4 at a time. 
 
Extension: Try adding a little bit of water to the soap.  Ask your child to describe the different textures.