Puffy Paint

If You Give A Mouse A Cookie – Sensory Art Activity

Basic Materials

Elmer’s school glue
Shaving cream
Large bowl
Spoon
Paint brush
Directions

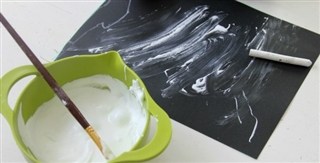
In a large bowl, mix well 1/2 cup Elmer’s glue with 1 cup shaving cream.  Your child will love exploring how it feels.  Use the puffy paint to make interesting paintings.

Painting Ideas

Snowy Picture: Invite your child to use a paint brush and make a snowy picture on blue or black construction paper with the puffy paint. If desirous, sprinkle glitter while paint is wet. Allow paint to dry. The paint will continue to get puffier as it dries.

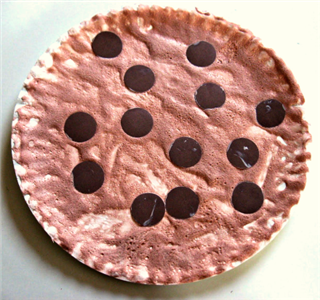
Cookie-Shape Painting: Read If You Give a Mouse a Cookie by Laura Nuneroff. Add brown tempera paint to the puffy paint  and stir. Invite your child to paint a paper plate to look like a cookie. Cut small circles out of black construction paper. Add them to the painting to look like chocolate chips. Display the cookie once it has dried completely.

Tasty Blueberry Muffins

(makes 12 muffins or 24 mini muffins)
 

Ingredients

1 ½ c. flour
¾ c. sugar
2 tsp. baking powder
½ tsp. salt
 
1/3 c. vegetable oil
1 egg
½ c. milk
1 tsp. vanilla
 
1 c. fresh blueberries
 

Directions

In a large bowl, whisk together flour, sugar, baking powder, and salt. In a separate small bowl, mix together with a fork vegetable oil, milk, egg, and vanilla.
 
Add wet mixture with dry ingredients and mix with a fork. Do not over mix!  With a spatula, gently fold in blueberries.  Spoon muffins into a paper-lined muffin tin.  

Optional:  Sprinkle with additional sugar.

Bake at 400 degrees for 15 – 20 minutes or until a toothpick inserted into the middle comes out clean. Store muffins in an airtight container.

Chocolate Dipped Nilla Wafers

Ingredients

Box of Nilla Wafers
Ghirardelli Dark Chocolate Melting Wafers
Wax Paper

Directions

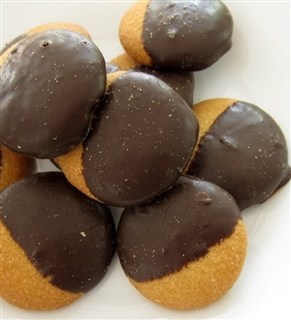
Melt chocolate in microwave according to instructions. Invite your child to dip Nilla wafers into the chocolate, covering half the cookie.  Place on wax paper to dry. The Nilla wafer is the sun; the chocolate coating is the moon passing in front of the sun. Frost the Nilla wafer with the chocolate coating to represent a total solar eclipse.  Enjoy!

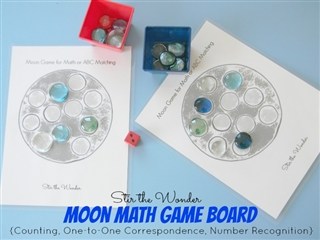
Moon Math Game

Supports counting, one-to-one correspondence, and numeral recognition
by Stir the Wonder

Materials

Game Board (one board per player)
Large Glass Gems (found at a craft store or the Dollar Store)
Die

Directions

Take turns rolling the die and placing the number of gems on your game boards.  The first player to fill their board wins.  This is a great game for practicing counting and one-to-one correspondence.

Lesson Extensions

Write numerals 1-6 on the game board, repeating them until all circles have a numeral written in the center.  Roll the die, count the dots, and match the number of dots to the numeral.  For an extra challenge, write numerals 2-12 on the game board.  Roll two dice, count the dots, and place a glass gem on top of the matching numeral. 

Solar Eclipse Drawing

Materials

White Chalk 
9×12 piece of construction paper – dark blue or black;smaller piece of construction paper cut into a circle to reprsent the moom.(approx.4×4)
Masking tape
Scissors
Hair spray (optional)

Directions

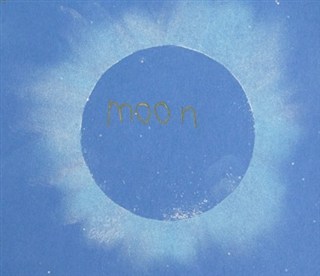
Cut out a circle from a small piece of construction paper. Tape the circle to the center of the 9×12 piece of construction paper. Trace around the circle template with a thin line of chalk. invite your child to color heavily with chalk on the edges of the circle template. Then invite your child to use a finger to spread the chalk out from the template onto the background construction paper. Make sure all the excess chalk is spread out or shaken off, and then remove the circle template to reveal the clear space behind it. Label the center moon. Chalk can be lightly sprayed with hair spray to keep it from smearing.

Explain a solar eclipse to your child. The white chalk represents the light from the sun.  The dark center circle is the moon.

Solar Eclipse Model Using Painted Paper Plates

Materials

Pool noodle
Tempera paints:  Yellow, Red, Orange, Black
2 paper plates
Containers to hold paint
Hole punch
Brass Brad
Newspaper

Directions

Cover the work surface with newspaper.  Pour a small amount of paint in four different containers. Using a sharp knife, cut the pool noodle into four small two-inch sections.  Using one pool noodle piece, invite your child to dip it into black paint and press it onto one of the paper plates.  Cover the whole plate.  This will be the moon. Using yellow, red, and orange, invite your child to cover the other paper plate.  This will be the sun.  Using a pool noodle gives wonderful texture to the surface and is easy for small hands to grip.  Paint brushes or small sponge pieces clipped with a clothes pin can be used, too. Once the paint has dried, use a hole punch and punch a hole towards the edge of each paper plate. Place the “black moon” on top of the “bright sun” and hold togther using a brass brad. 

Talk to your child about what happens during a total solar eclipse.  Use the paper plate model to show how the moon moves in front of the sun.  Invite your child to play with the plates, moving the moon on top of the sun.

Baked Snowballs

Materials

1 cup water
1 cup flour
Cotton Balls
Foil
Cookie sheet
Pam Non-Stick cooking spray
Food coloring (optional)

Directions

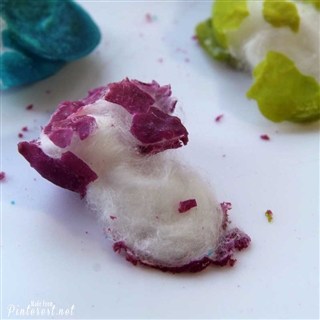
Mix water and flour. Divide into portions, if adding food coloring of choice. Wrap a cookie sheet with foil, spray with Pam Non-Stick cooking spray. Dip cotton balls in batter and place on baking sheet. Bake at 300 degrees for about 45 minutes. Let them cool and harden. Invite your child to smash open the cotton balls by pressing on them or using a small toy hammer. Close supervision is recommended.

Finger Painting with Chocolate Pudding

Ingredients

1 box of instant chocolate pudding mix
milk
bowl
large white paper

Directions

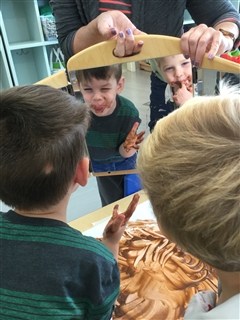
Make the chocolate pudding as directed.  Allow time to thicken.  Place a glob of chocolate pudding onto a piece of paper that has been taped to the table surface.  Invite your child to use his hands to made designs in the pudding.  Of course the best part is getting to lick your fingers as you work!  Once we brought out a mirror to show the boys their chocolate covered faces, they liked to even add more pudding to their faces!

Allow the paintings to dry or toss after enjoying the sensory art experience.  

Rainbow Bread

Ingredients

3 loaves of plain white Rhodes Frozen Dough, thawed and then cut in half
Bright gel food colors, purchased at a baking supply store
Pam Cooking Spray
2 loaf pans
 

Directions

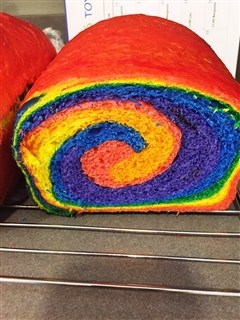
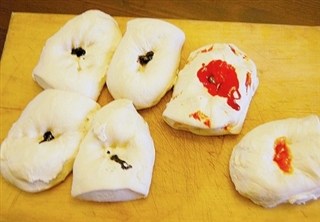
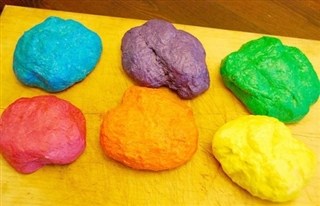
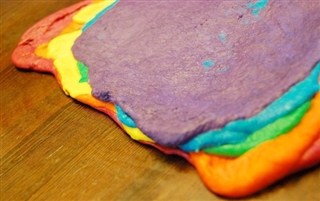
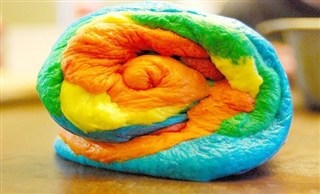
Press a dent into each of the six sections of dough and put ½ teaspoon of gel color into each section of dough. Knead each section until the color is throughout the dough.  Children love to help with this step!  Split each colored section of dough in half and then use Pam Cooking Spray and a rolling pin to roll out each section of dough onto the counter top.  Layer the colors on top of each other.  Do the same with the other half sections of dough to make a second loaf of bread.  Once all the colors are layered, roll the dough up into a log and place into well sprayed pans with the seam side down.  Let dough rise for 2 hours.
 
Heat oven to 400 degrees and bake for about 20 minutes. Remove from the oven and cool for 10 minutes.  Take bread out from pans and cool on racks.