Traveling by Car with a Toddler

By Dorothy Halverson, Director of Principia’s Acorn Programs

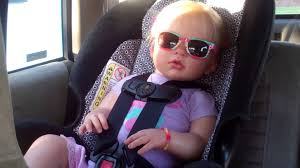
Keeping a toddler who has just discovered the freedom of movement, belted in a car seat for a long car trip can appear to be an impossible task. But, with some planning and preparing ahead of time, your road trip with a toddler can be a joyous and harmonious experience. 

Before you leave on your trip, get a good night’s sleep and have your children start the trip well-rested. Be sure that your child’s car seat is installed properly, pack plenty of water, a flashlight, and basic car safety equipment, such as jumper cables. Make sure your road assistance plan is up to date. Charge your phone before you leave, and bring a phone charger and an extra battery. Consider getting a battery that is solar-powered. 

As you pack the car, plan for easy access to things needed on the road. Keep jackets, hats, and basic outdoor supplies, like sunscreen and mosquito repellent, in a bag in the car’s cabin. If you’re heading to a warm climate, pack swimsuits and towels in a beach bag. You may stumble across a great swimming hole! Keep a change of clothes, wipes, diapers, and re-sealable plastic bags handy. 

Some essentials for traveling with children include: 
1. A portable potty and TP. If you’re at that stage, this is priority number one. 
2. “Lovies” and Blankies. Your toddler will enjoy snuggling with them and the blanket can be used to play peek-a-boo, too.  
3. Car Toys. Toddlers love sticker books, magnetic storyboards, drawing boards, and other toys that don’t involve lots of small pieces or make a gooey mess. A baking sheet can be used to play with magnets and doubles as a playing surface so crayons and toy cars don’t easily roll and slide away. Toddlers also enjoy toys that light up, make noise, and have moveable parts. If possible, choose toys that are new or that your child hasn’t played with for a while. 
4. Ball. Having a ball to throw or kick at rest stops can bring lots of fun for your toddler. 
5. Entertainment. Play your child’s favorite musical tunes, sing songs together, make music on a kazoo. Choose popular children’s shows like Sesame Street or Dora the Explorer if you watch child-friendly movies in the car. It is, however, wise to limit screen time. 
6. Books. Bring board books that your toddler can look at independently – old favorites and a few new ones, too. 
7. Plastic Zip-loc bags. Use bags to hold everything from errant game pieces to crayons or leftover snacks. 
8. Snacks and Drinks! Bring a variety of snacks (e.g. graham crackers, animal crackers, cheese sticks, O-shaped cereal, bananas, yogurt pouches, grapes, apple slices, and oranges) Bring an insulated bag for string cheese, yogurt pouches, and other perishables. Use spill-proof sippy cups. 
9. Choose baby-friendly restaurants. Search for restaurants that offer free children’s meals and have play areas for running around and climbing. Or pick up food and plan a picnic in a neighborhood park. 
10. A nightlight. Hotel rooms or relatives’ houses can be very dark at night. 

Sometimes it is helpful to sync driving time with your child’s eating and sleeping routines. For example, you might consider leaving a bit before lunchtime and let your toddler eat in the car. Then your child may nap while you log some miles. 

Some parents buckle their pajama-clad toddlers into their car seats and begin their travel at bedtime. This works if you’re not too tired to drive late at night – and if you’re reasonably sure your child will stay asleep. Bring along whatever helps your child settle down (like a bedtime buddy, lovey, or favorite music) so you can incorporate your normal bedtime routine into the trip when driving at night. 

Be prepared for stops along the way. The beauty of a road trip is that you can pull over and get out whenever you want. Try not to drive more than a couple hours in one stretch. Expecting young toddler to sit still much longer is unrealistic. Plus, doing something fun along the way makes the car trip itself enjoyable. A quick game of tag or catch at a park, or a stop at a roadside attraction can break up a drive without losing too much time. 

The secret is planning. Once you’re on the road, it can be hard to know where to stop. Before you leave, ask friends who know the route to recommend pit stops. Check online for playgrounds, parks, and old-fashioned attractions, such as giant statues and popular tourist stops. 

After a long day on the road, you’ll all need some time to unwind. Use your first day and night to help your family get used to new surroundings. This includes adjusting to new beds, strange sounds, and unfamiliar faces. Explore the neighborhood, check out the hotel’s facilities, or just spend time sitting around the living room visiting with relatives. Follow your child’s lead: Your toddler will want to check out every nook and cranny where you’re staying before he feels completely comfortable. 

Rent or borrow baby gear whenever possible. Most vacation destinations are well-prepared for visiting families, and make renting high-quality gear convenient and affordable. You can rent cribs, strollers, highchairs, backpacks, swings, and countless other toddler necessities. If you’re staying with friends or relatives, try to arrange ahead of time to borrow baby equipment from your hosts or a neighbor. 

Download an app, like Roadside America and Roadtrippers, to help you discover good places to stop along the way. Or try iExit, which tells you what services – like bathrooms and gas stations – are available at upcoming highway exits. 

Taking a trip with a toddler can be delightful. Toddlers show you the little things you may have forgotten about – bugs on a tree, the stones on the ground, and the bolts in a picnic table. They make sure you see the birds, flowers, trucks, and animals on your trip. Traveling with a content toddler is like bringing your own entertainment. It enriches your experience while providing important lessons in solitary play and patience in your child. 

Gingerbread Cloud Dough

Ingredients
8 cups of flour
1 cup of vegetable oil or baby oil
3 tbsp of cinnamon
2 tsp of ginger 
2 tsp of nutmeg 
Optional addition- brown powdered tempera paint

Colorful plastic buttons
Gingerbread shape cookie cutters
Large towel or blanket, if using cloud dough inside

Directions
Mix the above ingredients in a sensory bin or similar container. You can add more or less of the above spices to get the scent you prefer, and if the dough is too crumbly, you may add more oil to make it stick together. Both are great sensory experiences. Our Acorn friends reallly liked feeling the soft dough fall between their fingers and loved the cinnamon scent, so we added extra cinnamon spice. Invite your child to help measure and mix the ingredients.  He will love how the dough feels and smells. Closely supervise your child when playing with the dough. To help contain the mess, place a large towel or blanket under the container. Have fun!

Pinwheel Magic

Materials
Pinwheel (purchase from the Dollar Store)

Directions
Place a toy pinwheel in front of your baby and gently blow on it.  Observe how he reacts to the blur of beautiful colors and movement. Be careful not to allow him to grab the pinwheel, as the spinning edges are sharp and the toy contains small pieces. Pinwheels can also be placed in planters outside for your baby to observe either sitting him in front of them or observed from a window seat. This activity supports your baby’s visual and social development.

Teddy Graham Patterns

Materials
Teddy Grahams – two different flavors
Small container for 15-20 teddy grahams
Work space or plate

Directions
Pour several of each flavor of teddy grahams into the small container. Talk with your child about what a repeating pattern is and encourage your child to copy, extend, and/or generate simple pattterns. Lay a simple pattern out on a plate or on the table using the two kinds of teddy grahams. You migh start with an ABAB pattern.  Toddlers may be invited to copy the simple pattern that you have created. As your young preschooler grows in his understanding of patterns, encourage him to extend a pattern that has been started or generate new patterns. Always ask your child to verbally repeat the patterns that have been created. 

Tickling Textures

Materials
Various objects with different textures (e.g. large feather, soft ribbons, cotton balls, cloth, tissues, etc.)

Directions
Place your baby on a blanket on the floor — or on her changing table or in her crib. Gently brush the objects across her tender tummy, leg, or cheek. Observe how your baby responds to the various objects. You will proably be able to tell which items are her favorites by her excited kicks and coos. Of course, what makes this game even more interesting are your comments, like, “Isn’t this soft?” “Does this tickle?”) This is an activity that can often be used to entertain your baby for months!  She may even start suggesting tickle-me items on her own by the time she’s about a year old!

Tickle time promotes body awareness and social development as well as tactile stimulation. It also gives you a chance to practice responding to your baby’s cues and body language.

Tweezing Walnuts

Materials
Walnuts in their shells
Small tongs
Tray

Directions
Place walnuts on a tray. Provide a pair of small tongs for your child and invite her to use the tongs to pick up the walnuts. This is a great fine motor activity and requires good eye/hand coordination, as well. 

Texture Bears

Materials
Construction paper cut into a simple bear shape
Various small pieces of materials with interesting textures (i.e. velvet, sandpaper, feathers, bubble wrap, satin ribbon, etc.)
Glue

Directions
Begin by reading a favorite teddy bear book.  Then invite your child to glue small pieces of material with various textures all over the bear shape.  Talk about the way each one feels as she glues them onto the paper.  Introduce words such as rough, bumpy, soft, smooth, etc.

Extensions

  • Take a texture walk around your house with your child; identify things that are smooth, bumpy, soft, rough
  • Sort items according to their textures
  • Read “Touch and Feel” books with your child

Bottle Roll – Dry Sensory Bottle (6 months and up)

Materials
8-ounce baby bottle (or any plastic bottle – Voss Water bottles are sturdy and work well)
Dried beans, rice, un-popped popcorn, beads, buttons, googly eyes, etc.
Hot glue gun

Directions
Fill bottle about 3/4 full with dry materials. Safely secure lid by using a hot glue gun.  

Place the bottle near your baby and show him how to roll it back and forth himself. He will love to watch, listen to, and chase after the rolling bottles!  If your baby follows the rolling bottle, he will be practicing his crawling.  If he decided to sit and roll the bottle back and forth using his hand, he will be working on his fine motor skills and eye-hand coordination. 

Bubbles for Baby

Ingredients
1 cup water
1 teaspoon of glycerin (available in pharmacies)
2 tablespoons Dawn liquid dish detergent

Directions
Gently mix all ingredients together.  For best results, let sit for a few hours.

(Make bubble wands from pipe cleaners, plastic lids with the center cut out, or purchase)

Blowing bubbles in the bath tub contains the soapy residue that some bubbles leave on the floor and makes bath time more fun. A cascade of bubbles during diaper-changing time makes a pleasant distraction. Watching bubbles float through the air helps your baby practice visual skills such as eye tracking, distance, and depth perception. Trying to swat at them is excellent practice for her budding eye-hand coordination. And if she should actually catch one, she’ll learn a lesson in the relationship between cause (I touch the bubble) and effect (the bubble pops!)

Teaching Young Children about Gratitude

By Dorothy Halverson, Director of Acorn Programs

“Gratitude is much more than a verbal expression of thanks. Action expresses more gratitude that speech.” 
Science and Health with Key to the Scriptures, p. 3
 

Gratitude is one of the most important concepts to teach children. By learning gratitude, children become sensitive to the feelings of others, developing empathy and other life skills along the way. Grateful children look outside their one-person universe and understand that their parents and other people do things for them (e.g. prepare dinner, give hugs, buy clothing and toys). Indeed, instilling grateful feelings early will benefit your child later in life. 

Children as young as 15 to 18 months can begin to grasp concepts that lead to gratitude. They start to understand that they are dependent; that mommy and daddy do things for them. In other words, toddlers comprehend that they are separate beings from their parents, and that mommy and daddy often perform actions to make them happy, like playing peek-a-boo, even if they can’t yet articulate their appreciation. 

By age 2 or 3, children can talk about being thankful for specific objects, pets, and people. It is helpful to take time at the dinner table or at bedtime for everyone to express gratitude about their day. Toddlers just learning to talk can participate in this activity, especially as it is modeled for them each day. 

By age 4, children can understand being thankful not only for material things like toys but for acts of kindness, love, and caring. 

Gratitude is most easily taught through daily conversations and modeling. Children model their parents, so lead by example and use “please” and “thank you” when you talk to them. You might say, “Thanks for that hug — it made me feel really happy!” Insist on their using the words, too. After all, “good manners and gratitude overlap.”  

Ideas for teaching gratitude: 

  • Work gratitude into your daily conversation. Try to weave appreciation into your everyday talk — “Aren’t the colors in the sunset beautiful?” “I’m so happy when you listen!” Take time to reflect together each day, sharing all the good that happened. 
  • Give children responsibilities. Allow children to feel a part of the home by helping care for it. By participating in simple household chores like feeding the dog, stacking dirty dishes on the counter, and taking the folded laundry to each family member’s room, children realize the importance of lending a helping hand. 
  • Find a goodwill project. Research ways children can actively participate in helping someone else, even if it’s as simple as making cookies for a neighbor. As you’re stirring the batter or adding sprinkles, talk about how you’re making them for a special person, and how happy the recipient will be. 
  • Encourage generosity. Donate toys and clothing to charitable organizations. Children are often inspired when they see you giving to those in need, so spend time together going through your child’s closet to find something special to give to another child in need. 
  • Write thank-you notes. Toddlers’ cards might just be scribbles or stickers, but then attach your own words of thanks. As children grow, the scribbles become drawings, then longer letters. Younger children can even dictate the letter while you write. Just the act of saying out loud why your child loved the gift will make him feel more grateful. 
  • Practice saying no. Of course, children ask for toys, video games, and candy, and when every whim is granted, it can be difficult to feel grateful. Saying “No” on a regular basis helps diminish the feeling of entitlement and allows children to work through disappointment. 
  • Create a gratitude journal. Each day have your child list one thing that makes her feel grateful. This will help your child focus on all the good that unfolded during the day. 
  • Be patient. Gratitude requires weeks, months, even years of reinforcement. Be patient and know that from gratitude flows joy!