Ingredients:
1 cup Greek vanilla yogurt
¼ cup apple juice (more or less, depending on desired thickness)
Handful of frozen strawberries
Directions: Combine yogurt, apple juice, and strawberries in a blender. Blend until smooth. Enjoy!

Supporting Christian Science families and their young children
Ingredients:
1 cup Greek vanilla yogurt
¼ cup apple juice (more or less, depending on desired thickness)
Handful of frozen strawberries
Directions: Combine yogurt, apple juice, and strawberries in a blender. Blend until smooth. Enjoy!
Materials:
Pinecones
Tempera paint in pastel shades
Fine bristle paintbrushes
Newsprint to protect the table
Directions: Our class took a walk around the campus, collecting pinecones as we went. We brought our collection back to the classroom and set them out to dry in a basket for a day or so. We placed sheets of newsprint on the table and set out cups of pastel paint and paintbrushes (the kind that come in kids’ watercolor paint sets). Pastel shades of pink, green, yellow, purple, and orange were available. The children were encouraged to paint their pinecones using all or as many of the colors as they wished. They did not have to paint every scale of the pinecone—just enough until they were satisfied with their work. This project encouraged the children to focus on painting a small surface (the scales) and exercising the eye-hand coordination necessary to put the paint where they wanted it to go!
When the paint dried, the pinecones made a unique display in our classroom, hanging with twine from a specially selected stick!
Materials:
Gallon Ziploc bag
Tape
White tempera paint
Another primary paint color
Directions: We’re learning about how pastel colors are made from a mix of white and a bit of another color. To experience this, we used gallon Ziploc bags containing a puddle of white paint. Each child chose another color to add to his bag. We taped the bags to the table on one end, and also taped the zippered side to prevent any leakage. Then we encouraged the children to use their fingers and hands to mix the two colors together until the darker color became a pastel. When the children were finished mixing, we carefully cut a hole in one corner of the bag and squeezed the new pastel color into a jar to use for painting at a later date!
By Dorothy Halverson, Director of Acorn Programs
“How can I teach my child the spiritual concepts and moral values I cherish?” is a question often asked by parents.
Another one follows: “Is it possible to teach spiritual concepts to a young child who’s just learning the language and may not be thinking in abstract terms yet?”
Most educators agree that the best way to teach our cherished ideas is through example. As we love and live the spiritual concepts that inspire us, the child is certain to benefit. The infant or young child learns the special relationship of father and mother through experience. Our striving to express the qualities of principle and love in parenting can help his growing understanding of his Father-Mother God.
Studies have shown that a rigid, authoritarian approach to discipline tends to turn offspring from the religion of the parents. A consistent but loving approach gains the respect of children and a desire to learn. As with most education, the learning of spiritual concepts can’t be forced.
There are many ways to share our love of God with our little ones. Tiniest infants are quieted when we sing favorite hymns or voice spiritual truths. Meals can bring spiritual, as well as physical, nourishment, if we share some inspired thoughts that come to us. Bedtime is another special time to share prayers and spiritual thoughts. The joy and spirit with which we share is always as important as what we share.
When a child is two or three, a parent can begin to have a regular assembly or special time for a “spiritual breakfast” to explore spiritual ideas together. It’s important to keep these periods brief and interesting to the child. Look for simple concepts that can be meaningful to a child now, such as “God loves me and takes care of me,” “I can treat others the way I like to be treated,” “I can be cheerfully obedient to God, good,” “I can guard my thinking,” “God gives me courage and strength,” or “I can let my light shine.”
Read or share stories from the Bible to help illustrate a concept. For instance, the story of Daniel in the lions’ den illustrates God’s protection, or moral courage in standing for what’s right. The story of Baby Moses in the bulrushes shows God’s care for His children.
You can also tell present-day parables. My daughter enjoyed hearing stories I made up about children who had experiences remarkably similar to her experiences (though their names were different), and who found spiritual solutions to their problems. Children sometimes suggest solutions for their story friends and so are better prepared for the next perplexing situation that arises in their own experience.
Hand puppets can illustrate successful solutions to moral or social dilemmas. A character might find that when he’s kind, others are kind to him; that when he’s obedient, things work out better; or when he’s honest, he’s trusted. Children love to help reform errant puppets and can try different roles by being one of the puppeteers.
There are activities or games which can teach spiritual or moral concepts. A favorite one is the “knock knock game” which helps children differentiate between useful thoughts and detrimental ones. The child holds up a “door” or book and you knock on it saying, “Knock, knock.”
“Who’s there?” asks the child.
“I’m a little thought that says, “Don’t come when Mommy calls,’ May I come in?”
The child holds the book in place and shakes his head, and you say, “Good. You know not to let that thought in. Here’s another thought…..” If the thought is a helpful one, the child turns or opens the “door.”
You can present several thoughts and then let the child knock on your door of thought. A similar game uses an old or toy telephone and the child can hang up on “error” thoughts.
An activity to teach the concept of “letting your light shine,” is to put a bag over a lighted flashlight to show that when it’s covered up no one can see it. It’s important to carefully relate the illustration to the point you want to make. You might next put the bag on your head so the children can’t see who you are. If they want, they can put it on their heads and you can “wonder” who they are. Then you can say, “If I go around without saying ‘hello’ to people or helping them, it’s just as if I had a bag on my head. No one can see who I really am, God’s loving child.”
There are many such activities that can teach spiritual or moral concepts.
Preaching to a child or correcting him with a truism can backfire — turning him against the idea you wish to teach. It’s better to let him know when he is obeying a cherished precept, so he’ll learn to love it. For instance, “When you gave that toy to your little sister, you were obeying the Golden Rule. You knew that would make her happy, didn’t you?”
The most important thing to remember in teaching spiritual ideas to our children is to share the spirit and not just the letter. If we’re meeting resistance, it’s a signal to try a different time, place, or method.
It’s helpful to know that God is guiding and attracting His children, and we’re not intermediaries; but we can be inspired to share ideas we know are important in the very best way.
“What have I to teach another? Only what I myself have learned. My ability to impart will be in proportion to my own receptivity and utilization of that which is of value in my own experience. Intellectual food can be imparted only by one who has achieved scholarly attainments. Important as this phase of the work is, it is only one phase of education. Spiritual culture is of greater importance and is regarded as first in value.” (Education at The Principia p. 67-68)

Materials:
Color-coding dots
Plastic teddy bear counters, various colors
White sheet of construction paper
Directions: Stick the colored dots randomly all over the paper. Choose only those teddy bear counters that match the colors of your dots. Take a teddy bear and ask your child to find a dot of the same color where you can sit the bear. Place the bear on the dot. Once your child understands the idea, let him place bears on the dots, matching the colors as you did.
Materials:
Large (2 gal.) Ziploc bag
Magnetic steel-rimmed plastic counters from Amazon
Magnets
White paper
Water
Tape
Directions: This is a simple activity to set up and very engaging for young children!
Add a handful of magnetic plastic counters to the Ziploc bag. Pour in two cups of water. Zip the bag, being sure to get as much air out of the bag as possible. Use the tape to seal the bag to prevent accidental leakage. Place the white paper on the table with the Ziploc bag on top. You may want to tape the bag to the table to keep it from moving. Demonstrate to your child how to sweep the magnet over the bag to move the little counters around. Avoid dragging the magnet over the bag, as it eventually causes the bag to leak. If this is your child’s first introduction to using magnets, you can extend the learning by inviting your child to find items around your house that the magnet will stick to—maybe the refrigerator, paper clips, cans, etc. This is a trial and error exercise that can encourage your child to draw conclusions about magnetism, especially the fact that certain things attract the magnet, while other things don’t. Older children may be able to draw conclusions about why this is true, but don’t expect a child younger than four years to know. They are building foundational experiences with magnets.
Materials:
Large plastic tub
Foam sheets from a craft store
Scissors
Pen
Something round to trace—a glass, for example
Small plastic critters, bugs, etc.
Tongs (optional)
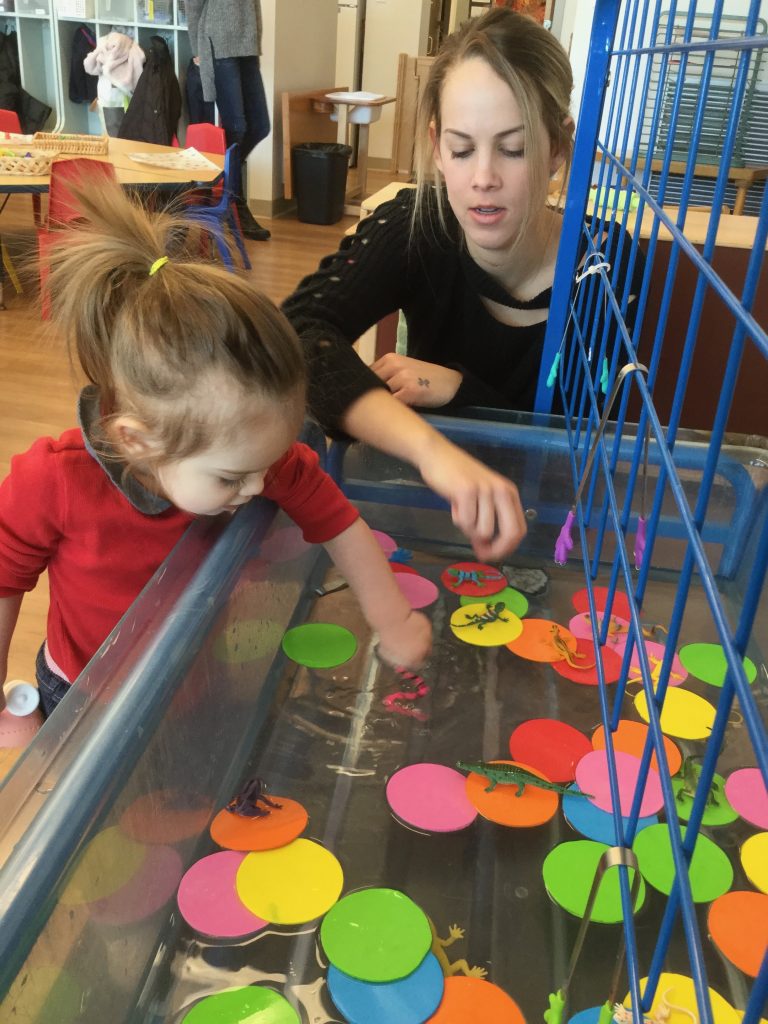
Directions: Set the glass on the foam sheet and trace around the rim. Repeat, making as many circles as you can on the sheet. Depending on the size of your tub, you may want to use more than one foam sheet. Cut out the dots. Fill the tub with about two inches of water, and scatter the polka dots on top. We added little plastic snakes, frogs, and lizards to our pond, along with tongs for picking up the critters and putting them on top of the dots. Tongs can be tricky for 1- and 2-year-olds, which is why they’re optional. The children were engaged for quite a long time putting critters on the polka dots and dumping them in the water! If your critters are small enough, they will float easily. We also had fun identifying which were lizards, which were snakes, and which were frogs.

Materials:
Dot markers
White paper
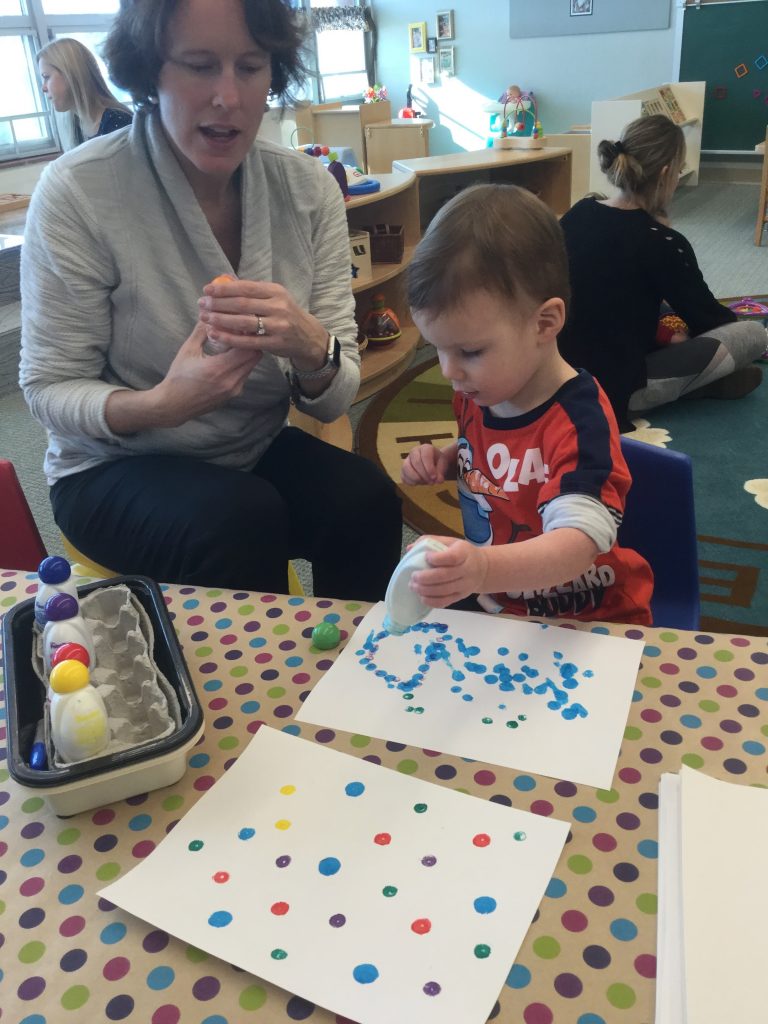
Directions: Set the paper in front of your child. Help her unscrew the marker cap, and then demonstrate how to use the marker by dotting the paper rather than drawing with it like a marker. To help with this, try making a few small circles on the paper and having your child fill them in with the dot marker. Initially, it will take a little practice, but young children love to make dots! Your child will enjoy experimenting with different color dots, too.

Ingredients:
Graham crackers
Whipped cream cheese
Mini M&M’s for baking or jumbo confetti sprinkles
Directions: Spread the whipped cream cheese on the graham cracker, covering the whole surface. Place the M&M’s or sprinkles in a random polka-dot pattern on top of the cream cheese. Eat and enjoy!
Materials:
2 plastic water bottles
Plastic tiddlywinks
Mini pompoms
Directions: Put 2 or 3 dozen tiddlywinks in one of the bottles. Fill the bottle with cold water. I added a few small ice cubes to the water to make it extra cold. Screw the cap on tightly. Add about an inch of mini pompoms to the other bottle. Add hot water from the tap, filling the bottle. Screw the cap on tightly. Hand the pompom bottle to your child, saying “hot” as you hand it to him. Let him examine the bottle for a minute. Encourage him to turn the bottle over, observing the pompoms floating through the water. Next, hand him the bottle with the tiddlywinks in it. Say “cold,” and let him observe how the tiddlywinks move through the water. Repeat the sensory play, reaffirming the words “hot” or “cold” as he re-examines each bottle.