When Can My Child Begin Solid Foods?

The following are some guidelines from the book, Nutrition: What Every Parent Needs to Know. Remember that each child’s readiness depends on his own rate of development. 

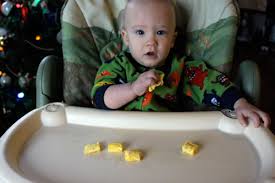
• Can he hold his head up? Your baby should be able to sit in a high chair, feeding seat, or infant seat with good head control. 
• Does he open his mouth when food comes his way? Babies may be ready if they watch you eating, reach for your food, and seem eager to be fed. 
• Can he move food from a spoon into his throat? If you offer a spoon of rice cereal and he pushes it out of his mouth and it dribbles onto his chin, he may not have the ability to move it to the back of his mouth to swallow it. It’s normal. Remember, he’s never had anything thicker than breast milk or formula before, and this may take some getting used to. Try diluting it the first few times, then gradually thicken the texture. You may also want to wait a week or two and try again. 
• Is he big enough? Generally, when infants double their birth weight (typically at about 4 months) and weigh about 13 pounds or more, they may be ready for solid foods. 

NOTE: Breastfeeding is recommended as the sole source of nutrition for your baby for about 6 months. When you add solid foods to your baby’s diet, continue breastfeeding until 12 months or as long as possible.

Introducing Finger Foods

Once your baby can sit up and bring her hands or other objects to her mouth, you can give your baby finger foods to help her learn to feed herself. Any finger food you give your baby needs to be soft, easy to swallow, and cut into small pieces. Some examples include: 

• Small pieces of banana 
• Wafer-type cookies or crackers 
• Scrambled eggs 
• Well-cooked pasta 
• Well-cooked chicken finely chopped 
• Well-cooked and cut up yellow squash, peas, and potatoes 

At each of your baby’s daily meals, she should be eating about 4 ounces, or the amount in one small jar of strained baby food. Limit giving your baby foods that are made for adults since these foods often contain more salt and other preservatives. Offering your baby fresh food is an excellent choice, but use a blender or food processor, or just mash softer foods with a fork before serving. All fresh foods should be cooked with no added salt or seasoning. Though you can feed your baby raw bananas (mashed), most other fruits and vegetables should be cooked until they are soft. Refrigerate any food you do not use, and look for any signs of spoilage before giving it to your baby. Fresh foods will spoil more quickly than food from a can or jar. 

Introduce good eating habits from the start. It is important for your baby to get used to the process of eating—sitting up, taking food from a spoon, resting between bites, and stopping when full. These early experiences will help your child learn good eating habits throughout life. 

Encourage family meals from the first feeding. When you can, the whole family should eat together. Research suggests that having dinner together as a family on a regular basis has positive effects on the development of children. Remember to offer a good variety of healthy foods and watch your child for cues that she has had enough to eat. Young children can self-regulate and will stop eating when they are full. 

NOTE: Food that requires chewing should not be given to your child at this age. Foods to avoid include: hot dogs (including meat sticks [baby food “hot dogs”]); nuts and seeds; chunks of meat or cheese; whole grapes; popcorn; chunks of peanut butter; raw vegetables; fruit chunks, such as apple chunks; and hard, gooey, or sticky candy. 

When your baby starts eating solid foods, it is normal for her stools to become more solid and variable in color, and to have a stronger odor, too. Your baby’s digestive system is still immature and needs time before it can fully process these new foods.

Butterfly Snacks

Materials
Snack size baggie
Clothes pins
Small goggly eyes
Pipe Cleaners
Goldfish crackers
Grapes
Glue

Directions
Glue the small googly eyes onto the clip end part of the clothes pins. in one half of the baggie, place goldfish crackers, and on the other end, place a few grapes.  Close the baggie and clip the clothes pin in the center of the baggie. Cut a pipe cleaner in half and clip onto the clothes pins to look like antennas. 

Your child will delight in these fun special snacks!

Tickling Textures

Materials
A variety of materials with different textures (e.g. nubby carpet remnants, sticky contact paper, bubble wrap)

Directions
As your baby begins to scoot and crawl, try laying rugs, blankets, or items with different textures on the floor for your child to explore as he travels across them.  Also, carry your baby around and help him feel the textures of different surfaces, such as a cool brick wall, a tree trunk, or grass. 

Making the Most Out of Playtime

Think of playtime as more than toy time. Playing is really any enjoyable activity that involves people, objects, or movement. Everything from blowing bubbles at each other to singing songs to splashing in the tub to chasing each other around the room qualifies.

Get down on the floor with your baby. You are the ultimate plaything, and any activity will seem more fun if your baby can share it with you. Talk to your baby while you play and you’ll help boost his language skills.

Introduce play activities when your baby is happy and rested. Playtime will be much more enjoyable for both of you if your baby is well-rested and ready for activity.

Stop when your child’s had enough. Take cues from your baby. He will let you know when he is done playing.

Give your child a chance to play alone and with others. Fifteen minutes is about the longest you can expect a 1-year-old to play alone. Solo play encourages independence, self-confidence, creativity, and language skills Learning to play with others usually develops between the ages of two and three.

Let your child choose activities and control the direction of his play.

Pastel Tissue Collage

Materials
Small pieces of colored tissue in pastel colors
Clear, sturdy plastic (We ran plastic from the laminating machine and cut it into squares. You can also use clear sheet protectors from an office-supply store or clear plastic fabric protectant from a fabric store)
Decoupage glue (Mod Podge—found at a craft store)
Paintbrush

Directions
Cover the work space with newspaper. Place a piece of plastic on the table. Put some Mod Podge in a small bowl and place a small amount of tissue cut in small squares or shapes in another bowl or basket. Invite your child to paint the plastic with the Mod Podge and then place pieces of tissue on top.  It is helpful to reinforce the tissue with more Mod Podge. This may require a little help from an adult. It is also fun to layer and overlap some of the tissue to make new colors. Dry completely. 

Flower Petal Counting

Materials
Flower Petal Counting Sheet (you can easily make one on the computer or draw one by hand)
Flat floral marbles

Directions
Place floral marbles in a small bowl or basket. Invite your toddler to use the marbles to make petals around the colored circles.  Count the marbles.

For preschool-age children, write a different numeral in the center of each circle. Invite your preschooler to place the correct number of petals on each flower. Ask, “Which flower has the most petals?” “Which flower has the least?” “How many more petals does the blue flower have than the yellow flower?”  “What if I add two petals to the pink flower? Now how many petals does it have?” The questions are endless and really help strengthen number sense.

Tube Tracks

Materials
Self-grip hair curlers (or you can tape toilet paper cardboard tubes to a wall)
Pompoms, Ping Pong balls, marbles
Felt board or large piece of felt material secured to the wall

Directions
Invite your child to help you create some tracks using the curlers or cardboard tubes by attaching them to a felt surface or wall. The fun experience with using curlers is they can easily be moved around to make new tracks and pathways. Once the track is ready, invite your child to roll pompoms, ping pong balls, marbles or any other rolling object through the tubes. Was the rolling object successful in getting through all the tubes? If not, can your child solve the problem?

This activity allows children to be creative, to problem solve, to make predictions, and use visual discrimination

Funky Brush Painting

Materials
Funky brushes
Tempera paint
Large white paper
Tape
Plates for paint (one plate per color)

Directions
Tape paper to the work surface. Pour a small amount of tempera paint onto each plate.  Invite your child to dab the funky brushes into the paint and then transfer the paint onto the paper.  Children will enjoy exploring with the various brushes—dabbing, pressing, swishing, etc.  What new colors are made as the paint mixes on the paper?

Cloth Sensory Bin

A fun activity to help your baby enjoy tummy time!

Materials
4-6 colorful cloth napkins or scarves
Small plastic bin (shoebox size) or basket
2-3 rattles
Blanket

Directions
Place the cloth napkins or scarves in the plastic bin or basket. Tie a few rattles onto corners of the napkins or scarves. Place the bin on the blanket and your baby on his tummy near the bin.  Watch as he starts to pull napkins out of the container and enjoys the fun surprises tied to the fabric. 

This is a fun activity for older siblings to engage in with the baby.