Caterpillar Color and Shape Sorting

Materials
Craft foam in various colors
Scissors
Painters tape
Markers
Large Googly eyes (optional)
Large piece of poster board to stick the calerpillar on
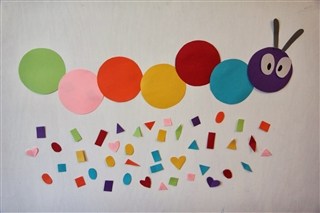
Directions
Use the inside of the roll of painters tape to trace one circle on each color of craft foam. Cut out the circles. Use the scraps to make additional shapes – small triangles, circles, squares, rectangles. Tape the circles onto the poster board to make a caterpillar shape. Add eyes- either hand drawn or googly eyes and antennas to the head. Invite your child to match the colors of the shapes to the color sections on the caterpillar. Review the names of the shapes and colors as the shapes are sorted.

Lesson Extensions for Preschoolers

  • Write upper case letters on the caterpillar circles and lower case letters on the various shapes. Match lower case to upper case letters.
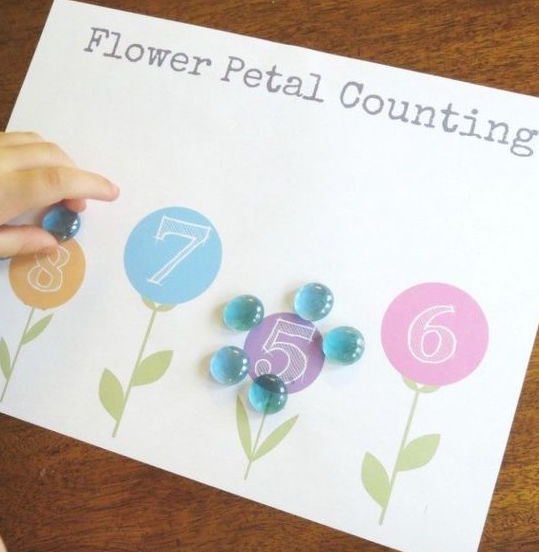
  • Draw dots on the circles of the caterpillars; write numerals on the shapes. Match the numeral to the number of dots. 
  • Write numerals 5-10 on the circles of the caterpillars. Encourage your child to use addition skills to add two numbers together on the shapes that equal a numeral on the caterpillar

Butterfly Snacks

Materials
Snack size baggie
Clothes pins
Small goggly eyes
Pipe Cleaners
Goldfish crackers
Grapes
Glue

Directions
Glue the small googly eyes onto the clip end part of the clothes pins. in one half of the baggie, place goldfish crackers, and on the other end, place a few grapes.  Close the baggie and clip the clothes pin in the center of the baggie. Cut a pipe cleaner in half and clip onto the clothes pins to look like antennas. 

Your child will delight in these fun special snacks!

Tickling Textures

Materials
A variety of materials with different textures (e.g. nubby carpet remnants, sticky contact paper, bubble wrap)

Directions
As your baby begins to scoot and crawl, try laying rugs, blankets, or items with different textures on the floor for your child to explore as he travels across them.  Also, carry your baby around and help him feel the textures of different surfaces, such as a cool brick wall, a tree trunk, or grass. 

Pastel Tissue Collage

Materials
Small pieces of colored tissue in pastel colors
Clear, sturdy plastic (We ran plastic from the laminating machine and cut it into squares. You can also use clear sheet protectors from an office-supply store or clear plastic fabric protectant from a fabric store)
Decoupage glue (Mod Podge—found at a craft store)
Paintbrush

Directions
Cover the work space with newspaper. Place a piece of plastic on the table. Put some Mod Podge in a small bowl and place a small amount of tissue cut in small squares or shapes in another bowl or basket. Invite your child to paint the plastic with the Mod Podge and then place pieces of tissue on top.  It is helpful to reinforce the tissue with more Mod Podge. This may require a little help from an adult. It is also fun to layer and overlap some of the tissue to make new colors. Dry completely. 

Flower Petal Counting

Materials
Flower Petal Counting Sheet (you can easily make one on the computer or draw one by hand)
Flat floral marbles

Directions
Place floral marbles in a small bowl or basket. Invite your toddler to use the marbles to make petals around the colored circles.  Count the marbles.

For preschool-age children, write a different numeral in the center of each circle. Invite your preschooler to place the correct number of petals on each flower. Ask, “Which flower has the most petals?” “Which flower has the least?” “How many more petals does the blue flower have than the yellow flower?”  “What if I add two petals to the pink flower? Now how many petals does it have?” The questions are endless and really help strengthen number sense.

Tube Tracks

Materials
Self-grip hair curlers (or you can tape toilet paper cardboard tubes to a wall)
Pompoms, Ping Pong balls, marbles
Felt board or large piece of felt material secured to the wall

Directions
Invite your child to help you create some tracks using the curlers or cardboard tubes by attaching them to a felt surface or wall. The fun experience with using curlers is they can easily be moved around to make new tracks and pathways. Once the track is ready, invite your child to roll pompoms, ping pong balls, marbles or any other rolling object through the tubes. Was the rolling object successful in getting through all the tubes? If not, can your child solve the problem?

This activity allows children to be creative, to problem solve, to make predictions, and use visual discrimination

Funky Brush Painting

Materials
Funky brushes
Tempera paint
Large white paper
Tape
Plates for paint (one plate per color)

Directions
Tape paper to the work surface. Pour a small amount of tempera paint onto each plate.  Invite your child to dab the funky brushes into the paint and then transfer the paint onto the paper.  Children will enjoy exploring with the various brushes—dabbing, pressing, swishing, etc.  What new colors are made as the paint mixes on the paper?

Cloth Sensory Bin

A fun activity to help your baby enjoy tummy time!

Materials
4-6 colorful cloth napkins or scarves
Small plastic bin (shoebox size) or basket
2-3 rattles
Blanket

Directions
Place the cloth napkins or scarves in the plastic bin or basket. Tie a few rattles onto corners of the napkins or scarves. Place the bin on the blanket and your baby on his tummy near the bin.  Watch as he starts to pull napkins out of the container and enjoys the fun surprises tied to the fabric. 

This is a fun activity for older siblings to engage in with the baby. 

Pastel Beads on a Wooden Skewer

Materials
1 wooden skewer
1 piece of floral styrofoam 
Plastic pastel beads in a small container (pony beads work well)
Dice

Directions
Place the wooden skewer into the piece of styrofoam.  Invite your child to place beads onto the skewer.  For an added challenge, provide 1-2 dice.  The child rolls the dice, counts the number of dots, and places that corresponding number of beads on the skewer.  Older children may also be encouraged to create repeating bead patterns as they are placed on the skewer.

Dyeing Rice

Ingredients

  • Uncooked rice
  • Food coloring or icing gels
  • Vinegar
  • Plastic containers with lids or Zip-loc bags
  • Newspaper or paper plates
  • Cookie sheetDirections
    Place the rice in container or Ziploc bag (up to two cups). In a small bowl, mix together 1 tsp of vinegar with a generous dab of icing gel or 1/2 of a small  bottle of food coloring. Pour the vinegar/icing gel mix over the rice and seal the container. Shake vigorously, until the rice is well coated. Pour the rice out in a single layer onto a cookie sheet covered with newspaper or paper plates and let dry. 

    Place dried, dyed rice in a large bin and invite your child to scoop, pour, mix, and explored the rice.  It’s a great sensory experience. For older children, provide small cups or plastic eggs in colors of the rice and encourage your child to scoop the correct color rice into the matching containing.