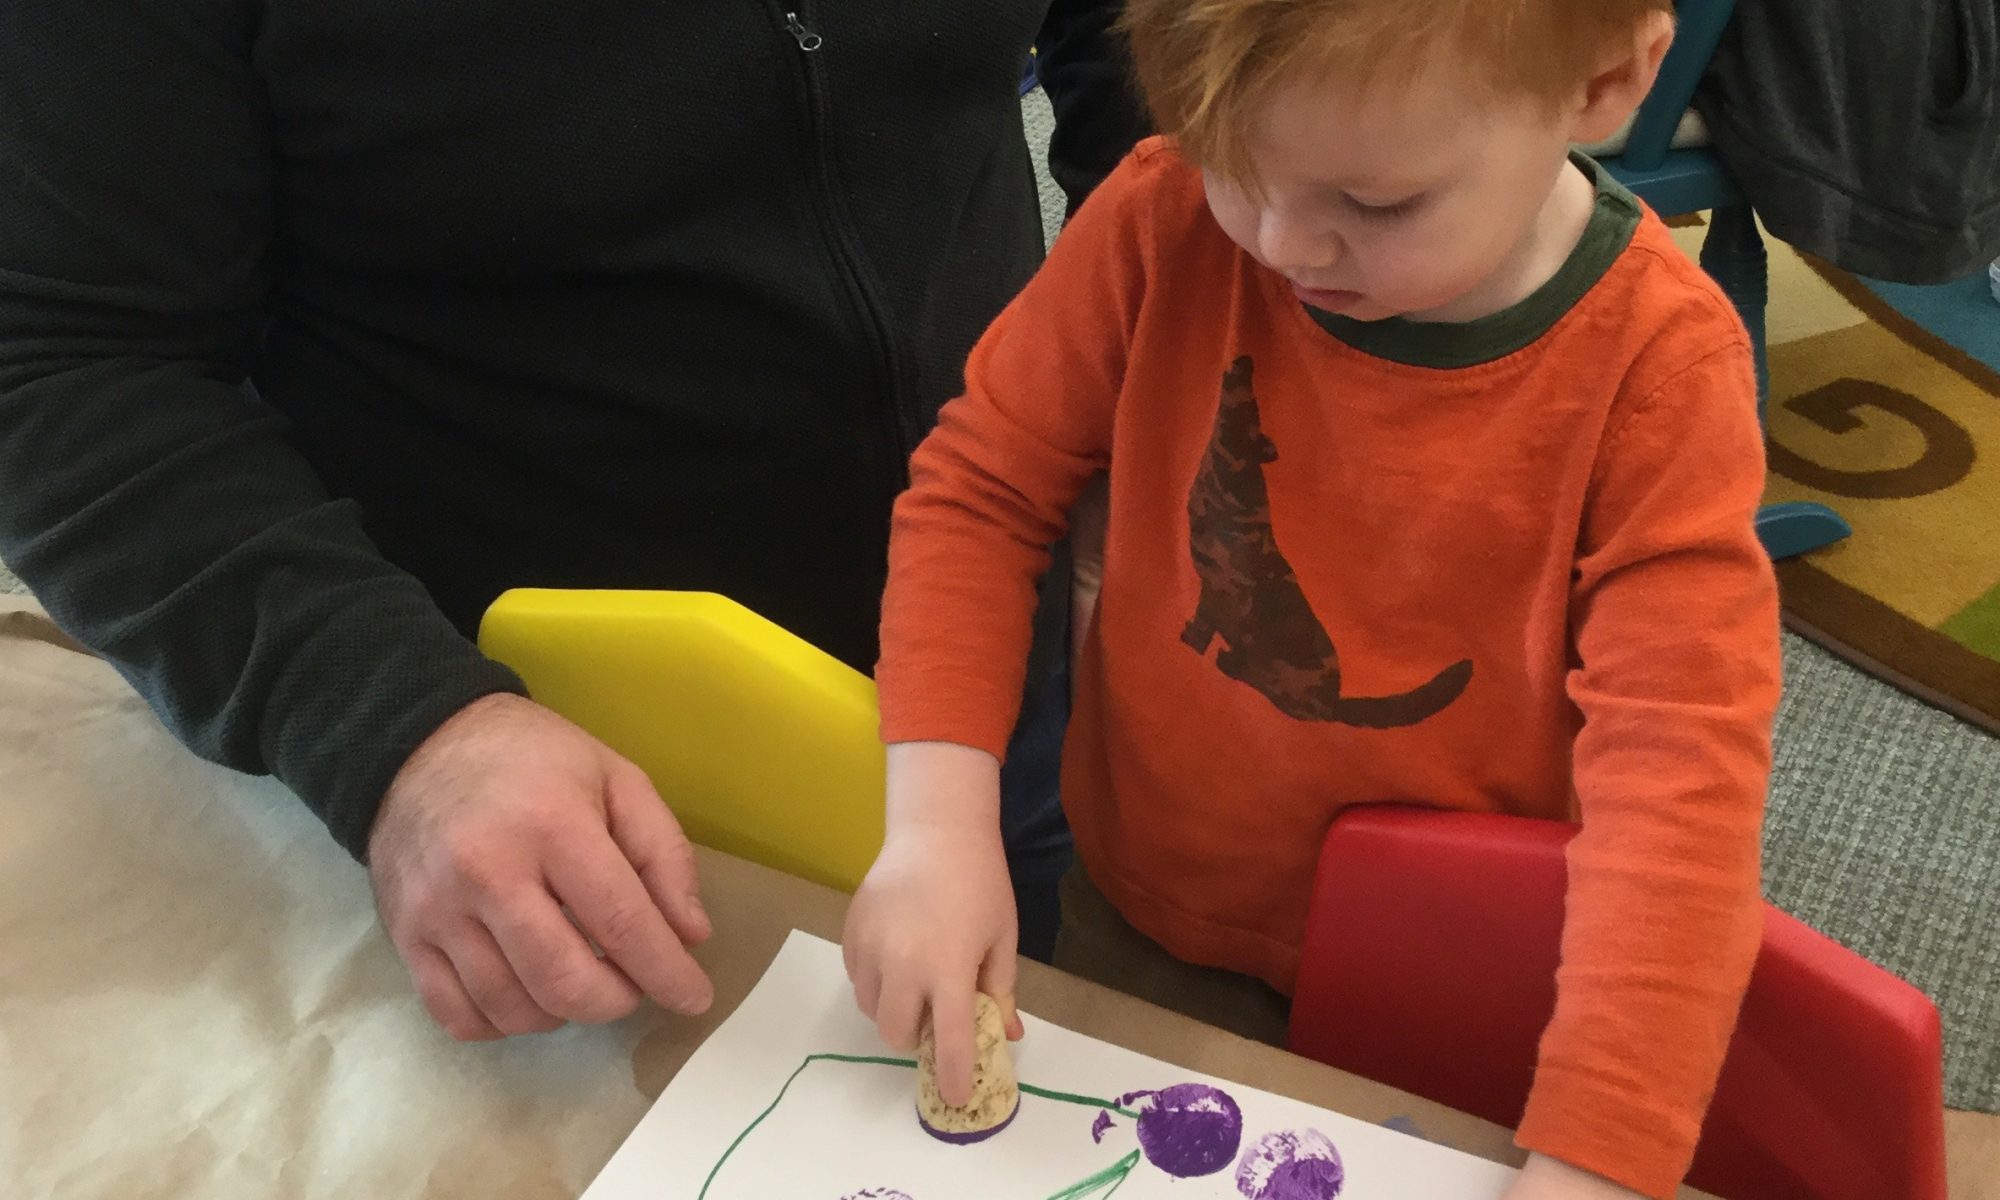
Purple Grape Prints

Materials     
Styrofoam meat tray with a few damp paper towels folded in it
Liquid purple tempera paint
A couple of corks
Construction paper
Green marker

Directions     
Pour a small amount of purple paint on the paper towels in the meat tray.  Dab the bottom of the cork into the paint and blot it on the paper towel if needed.  Press the cork to the paper and make prints, replenishing with more paint as the cork requires.  If you happen to have a bunch of grapes in the fridge, show your preschooler how close together they are on the vine.  Encourage them to print their grapes close together, but it’s not absolutely necessary.  Using the green marker, draw a stem and some tendrils on the “bunch” when done.

Purple Dragon Smoothies

Ingredients     
16-ounce container of vanilla yogurt
1 ½ cups frozen mixed berries (one of the berries should be blueberries or blackberries to give the smoothie the purple color)
½ cup apple juice (Try grape juice if you want a dark purple color!)

Directions       
Put all ingredients in the blender and replace the lid.  Mix on the smoothie setting if you have one. Otherwise, mix until all ingredients until thoroughly blended. We like to pour the smoothie into purple cups, complete with a purple straw. Enjoy!

Purple Paint-Chip Matching

Materials     
Several variant paint chip cards in the same color family (purple)
Construction paper
Marker
Scissors
Glue stick

Directions       
Using the marker and construction paper, make a very basic chart, consisting of a line down the length-wise center of the paper, and a few lines cross-wise on the paper.  Cut two identical shapes of each color you’re going to put on your chart.  Use the glue stick to glue one of the matching shapes on the left side of the first box.  Put the other one in a little bowl or basket.  Continue on in the same way, gluing one of your pair of shapes to the chart, and putting the other one in the basket.  When you’ve finished gluing the shapes, hand your preschooler  the basket of shapes and let him place the matching pairs in the correct boxes, side by side with the matching color.  Be careful not to include colors that are so closely related that it’s difficult for an adult to tell if they match!  Preschoolers are not able to differentiate such minimal changes in shades yet.  And if you don’t want to make a chart, you can cut the paint chip cards in half, giving your child half the cards, while you keep the other half.  Have him lay his cards in front of him on the floor.  Hand one of your cards to him and let him find the match.  Continue on in this way, until you have no more cards and he’s made all the matches!

Ball Balance

Materials       
5 toilet paper tubes
5 plastic ball-pit balls or similar sized, light-weight balls

Directions   
Set  the toilet paper tubes standing up on the floor in front of your baby. Take one of the balls and set it on top of one of the tubes.  Hand another ball to your little one and let him/her set it on top of another tube.  You can help them if necessary.  When doing this with Baby H., 13 months, she took each ball from me and placed it on a tube, although she knocked over some of the tubes more than once as she worked.  When a tube fell over, she handed it to me to set up.  Then she handed the ball to me.  I handed the ball back to her, and she set it on top of the tube. When she was done, she knocked over all the tubes and balls, but helped me pick them up when I asked her to.  Baby H. demonstrated persistence and focus as she placed the balls on the tubes; in addition she was able to understand my directions and she exhibited good fine motor skills and hand-eye coordination in completing the task

Pumpkin Rice Krispy Treats

Ingredients
3 tbsp. butter
½ tsp. vanilla extract
Red and yellow food coloring or orange gel coloring
5-1/2 cups mini marshmallows
6 cups crispy rice cereal
Mini Tootsie Rolls

Directions
In a large saucepan, melt and slightly brown the butter on medium heat. Add vanilla extract and marshmallows. Stir until marshmallows are completely melted. Add food coloring until desired orange color is reached. Add cereal and stir until completely combined. Turn off heat and let sit for a few minutes, until cool enough to handle.

When mixture has cooled enough, spray your hands with cooking spray and mold cereal mix into circles. (I made nine medium-sized pumpkins). Unwrap a tootsie roll and press into each pumpkin top.  Enjoy!

Tower Building

Materials     
A firm, flat surface, such as a table top, a tray, or the floor
Small, easy-for-a-toddler-to-handle blocks
A ruler (optional)

Directions       
Give your child a small pile of blocks. They can be all the same color or not, but initially, they should all be the same size. Give yourself a similar pile of blocks. Show your child how to carefully place one block squarely on top of another, until you have a tower 4 or 5 blocks high.  Invite you child to try building a tower just as high as yours. You can place the ruler on top of both towers (if they’re close enough) to compare whether they are the same height. If one tower is shorter, let that tower’s builder catch up. Continue building until someone’s tower falls down. We have a rule that ONLY the person who built something may knock it down, so if you’re building towers with more than one child, you may want to make a similar rule.

Tower building is a great exercise in fine-motor control, perception, persistence, and hand-eye coordination. For older children you can extend the activity by asking your child to make a pattern with the blocks or to count how many blocks they used. 

Tissue Paper Mini Pumpkins

Materials     
Mini pumpkins
Small pieces of colored tissue paper
Watered-down Elmer’s glue, in a cup
Foam paintbrushes
Waxed paper

Directions       
Cover the work surface with newspaper. Give your child a pumpkin. Let him dip his paintbrush in the watered-down  glue and paint a section of the pumpkin. Immediately, he should place tissue paper over the wet glue. Use the paintbrush to paint over the tissue paper, covering any dry spots. Continue the process, doing a small portion at a time. When your child is finished, set the pumpkin on the waxed paper to dry. The result is a very colorful fall decoration.

Rubber Band Stretch and Find

Materials     
9”x 13” cake pan
7 rubber bands, long and stretchy enough to go around the pan
6 or 7 household items for your baby to retrieve from the pan (i.e., a small block, a baby spoon, a small rattle, a ball, etc.)

Directions       
Stretch the rubber bands evenly around the cake pan—3 lengthwise and 4 width-wise. Place your items in the pan under the rubber bands. Choose items that are large enough not to be choke hazards. (Even so, you’ll want to supervise your baby as he approaches this activity.) Set the pan in front of your baby.  He’ll start trying to grab items from the pan, but will have to work at getting around the rubber bands. When we tried this with Baby R, he put his hand through the rubber band openings, but couldn’t figure out how to pull an item out at first.  He pulled on the rubber bands, then let go, discovering the band made a sound when he let go. R tried to grab for items, but would get a finger hooked on the rubber bands. He pulled on the rubber bands hard enough to even turn the pan upside down, dislodging a couple of the items!

This activity provided just enough challenge to hold R’s interest for quite a while without frustrating him.  It’s a fun way to practice hand-eye coordination and fine motor skills, too.

Pumpkin Spice Scented Play Dough

Ingredients   
1 ½ cups flour
½ cup salt
2 teaspoons cream of tartar
2 teaspoons pumpkin pie spice
2 tablespoons oil
1 cup boiling water
Orange food coloring (I like Wilton gel colors because the results are so vibrant)

Directions       
Measure all dry ingredients into a bowl and mix together.  In a small saucepan, combine the water, oil and food color, and bring it to a boil.  Pour the boiling liquid into the dry ingredients and stir to blend.  When cool enough, knead the play dough until smooth.  Your child can help with the kneading when the dough cools a bit.  Get out a few cookie cutters, plastic knives, a rolling pin, etc. and join your child in some sweet-smelling creativity!


Orange Stickers All in a Row

Materials       
Piece of paper, roughly 3” x 9”
Marker
Orange circle stickers from an office supply store

Directions       
Draw a line across the paper with the marker.  It can be a straight line, curvy, zigzag—whatever kind of line you’d like. Give your preschooler a strip of colored stickers. Starting on the left side of the paper, demonstrate how to peel a sticker off the backing and place it directly on the line. Encourage your child to peel the stickers off the strip, one at a time, and place them on the line, working from left to right. The task of peeling the stickers from their backing and placing them on the line is a fun way to practice the fine-motor and focusing skills that are needed for writing, cutting, buttoning, and zipping (among other things) as your child gets a little older!