Chocolate Pudding Finger Painting

Materials     
1 box instant chocolate pudding mix
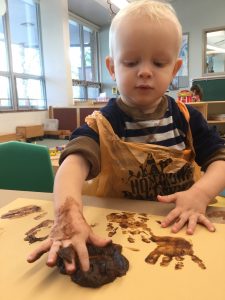
Milk
Large sheet of paper
Paint smock

Directions       
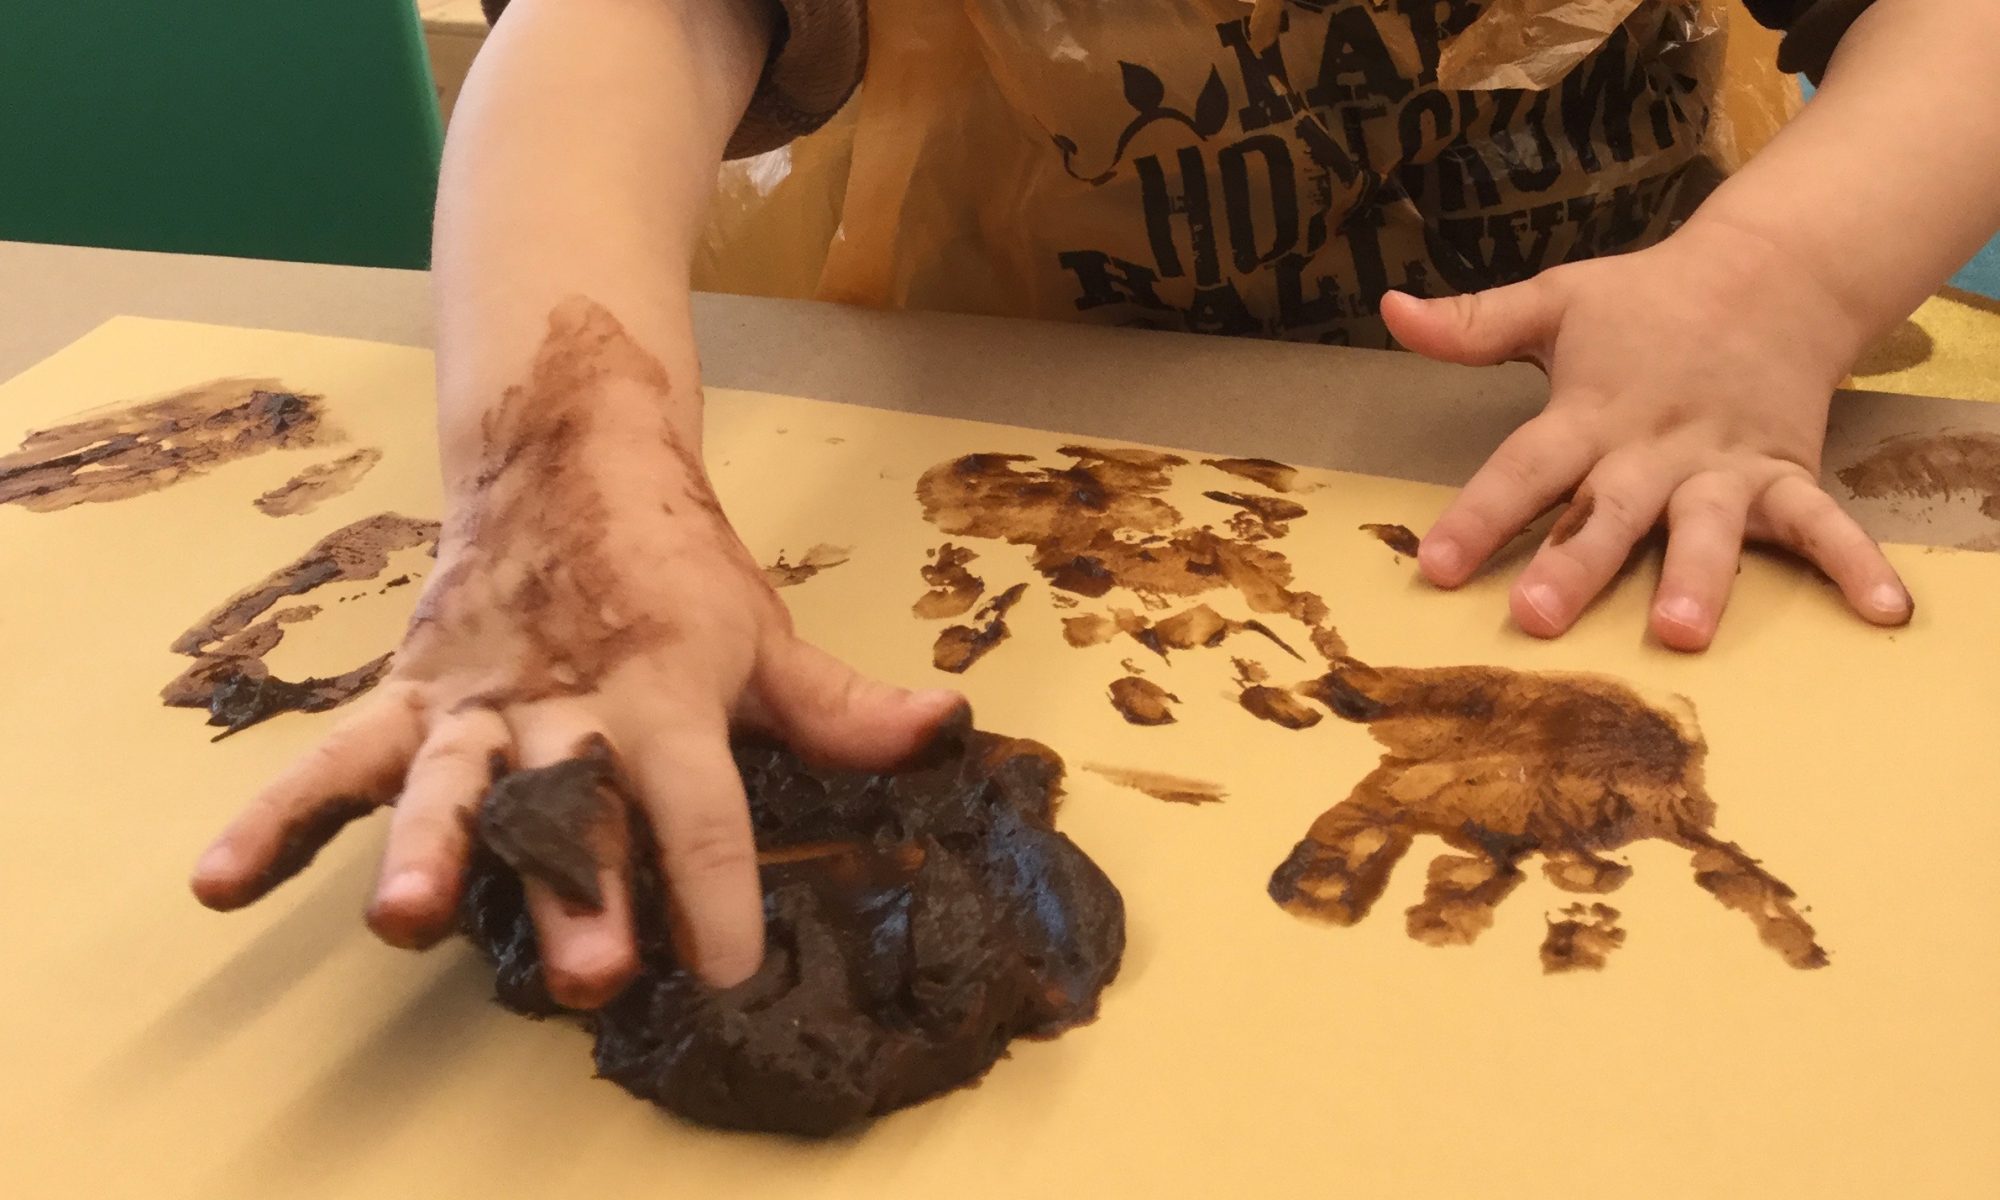
Make the chocolate pudding according to the package directions. Put a smock on your child – this is a messy project! (An easy smock to make uses a grocery store shopping bag. Cut the bottom of the bag off. Slip the bag over your child’s head, slipping their arms through the bag’s handles. It covers the majority of your child’s clothing and, when he’s finished painting, you can throw the bag away!)

When you’ve mixed the pudding thoroughly, drop a spoonful of pudding on the paper.  Encourage your child to stick a finger in it to feel the texture.  “Draw” through the pudding, using both hands. The texture of the pudding is smooth and creamy, the smell is chocolatey, and the best part is licking your fingers when the painting is done! Let it dry as you would any painting.

Walnuts in the Egg Carton

Materials       
A bag of walnuts in the shell
A set of tongs big enough to accommodate a walnut
An empty egg carton

Directions       
Place the walnuts in a basket or bowl.  Supply your child with a pair of tongs that are big enough and will grip the walnut.  Salad tongs that are attached or some toaster tongs will work. (Walmart sells small tongs inexpensively. )

Tongs take practice—so demonstrate to your child how to use a pair. Once he or she gets the idea, let him transfer the walnuts from the bowl to the egg carton.  Bigger cartons, holding a dozen and a half or two dozen are ideal. This activity demands persistence, focus, and exercising fine muscles—and it’s fun!

Spaghetti Threading

Materials       
Ball of brown play dough
A few pieces of uncooked spaghetti
Chocolate Cheerios

Directions       
Make a ball of brown play dough to act as a base for the spaghetti.  Insert the spaghetti pieces securely into the play dough.  You can break the spaghetti so that some pieces are shorter than others.  Show your child how to thread a piece of the cereal onto the spaghetti and push it down to the bottom.  Our rule is that if you come across a piece of broken cereal, you have to eat it!  (But plenty will get consumed even without the rule!)

This is a great fine-motor skill, and requires both hands to be successful.  And using the chocolate cereal makes it a fulfilling activity for your child!


Exploring Snow

Materials       
Tub of pristine freshly fallen snow
4 or 5 simple items for your baby to grab
Bath towel for your baby to sit on

Directions       
We recently had the first snowfall of the season, and the novelty of it inspired me to introduce snow indoors to Baby C., who is 9 months old.  I spread out a bath towel on the floor for Baby C. to sit on and to absorb any melting snow.  I also put a few colorful plastic geometric shapes, halfway hidden in the snow to pique Baby C.’s interest.  She reached out to touch the snow, then patted it, as if she wasn’t too familiar with the stuff.  Then she picked up a small amount and it went right to her mouth, which was not surprising.  Babies are very sensory creatures and make connections with their world through touching, smelling, examining closely, hearing and of course, mouthing/tasting. After Baby C. had tasted some of the snow, she went for the half-hidden shapes, and proceeded to pull them out of the tub and put them into her mouth, licking the snow almost like she would from a spoon.  I’ll be interested to try this experience again when it snows, and she’s a little older, to see what she does!

Acorn Drop

Materials
1 empty plastic bottle (Voss water bottles work well!)     
Acorns 
Small bowl or basket

Directions
Place acorns that you and your child have gathered into a small plastic bowl or basket. Provide an empty plastic bottle. Invite your child to pick up one acorn at a time using the pincer grasp (thumb and index finger) and drop the acorn into the plastic bottle. Continue until your child loses interest. Pour the acorns out and count them with your child before placing them back into the bowl or basket.

This activity helps strengthen the pincer grasp, which is needed for writing, and practices eye and hand coordination and one-to-one correspondence as you count the acorns.

Zebra Stripes

Materials     
1 sheet of white construction paper
1 sheet of black construction paper
Glue stick

Directions      Tearing paper is fun and a great way to practice fine motor skills!  Ditto for using a glue stick to glue the torn paper down!  Take the black sheet of construction paper and show your child how to tear the paper from top to bottom width-wise. Let him try it!  You may have to assist at first by holding the paper at the top so he can tear it.  It doesn’t matter if the torn pieces are uniform or not.  When your child has finished, let him use the glue stick to glue the pieces to the white sheet of paper, with a little space between each strip.  When he’s done, his paper will look like the side of a zebra!

Spider Web

Materials       
White paper
Pizza box
Black tempera paint
2-3 marbles
Plastic spiders from a dollar-type store
Sticky dots, double-sided tape or a drop of Elmer’s glue

Directions       
Cut your paper to fit inside the pizza box.  Squirt (or spoon) a small amount of black tempera across the paper.  Let your toddler drop 2–3 marbles into the box and close the lid securely.  Show your child how to shake the box from side to side, or in a circular direction.  Listen for the marbles rolling around inside.  When your child is done shaking the box, open it carefully and remove the marbles with your fingers or use a spoon. Determine where your child wants to stick the spider, and put your adhesive of choice there.  Let your child place the spider on the spot.  You’ve got a spider on his web!

Pompom-Filled Whisk (for babies 7-12 months)

Materials     
Kitchen whisk
Pompoms

Directions     
Stuff a regular kitchen whisk with pompoms.  Show your baby how to pull a pompom out of the whisk.  Hand the whisk to your baby and let him try to get the pompoms out.  When I did this exercise with Baby T, 7 months, he happily took the whisk from me, looked at it and waved it around.  A couple of pompoms fell out.  He hit his leg inadvertently with the whisk and a few more fell out.  He dropped it at one point, and one or two more fell out.  He waved the whisk around, holding it by the wire end and all the rest fell out except for two jumbo pompoms.  He did not attempt to pull them out.  He just continued waving the whisk around, occasionally mouthing the handle. 

I’ll be interested to try this activity with Baby T in a few months.  As his fine motor coordination develops, I anticipate that he’ll be more inclined to actually pull the pompoms out of the whisk. 


Halloween Spaghetti

Materials       
1 pound of spaghetti per color you want to make
Large cooking pot
Water for cooking the spaghetti
Colander for draining
Food colors of your choosing
Vegetable oil
Gallon size Ziploc bags

Directions       Halloween spaghetti is an engaging sensory activity that preschoolers love to get their hands into!  And it’s easy to make.  Basically, fill your pot with water, bring it to a boil, and cook the spaghetti according to the package directions.  About two minutes before the end of the cooking time, add 2 tablespoons of cooking oil to the spaghetti, along with the food color of your choice.  Turn off the heat, and stir the oil and food color into the spaghetti.  Orange and black are a good Halloween choice.  Once the food color is evenly mixed into the spaghetti, drain the spaghetti in a colander.  Run cold water over the spaghetti to set the color.  Once drained and cool enough to handle, put the spaghetti into a large Ziploc bag and put it in the refrigerator.  Cook another batch of spaghetti in the same manner, adding a different food color.


            If the spaghetti gets sticky, pour a little vegetable oil on your child’s hands, rub them together, and that should solve the problem.  The spaghetti is not harmful if your little one should decide to eat some.  After the spaghetti play is finished, put it back in the Ziploc bag and store it in the fridge again.  It generally keeps for 4-5 days before you should throw it

Black Cat Oreos

Ingredients   
Oreos
Chocolate tube decorating frosting
M&Ms
Pumpkin sprinkles
Chocolate chips
Black edible marker

Directions       
Put a healthy dot of the tube frosting on the back of the M&M’s and attach to the cookies for eyes.  Use a toothpick dabbed in frosting to attach the pumpkin sprinkle upside down on the cookie for the nose.  Put a small dot of frosting on the bottom of the chocolate chip and attach to the top of the cookie for ears.  Draw the center of the cat’s eye  on the M&M’s with the edible marker.  Meow!