Making Cloud Formations

Making Cloud Formations

Materials

Shaving Cream
Elmer’s School Glue
Small bowl
Spoon
Blue construction paper
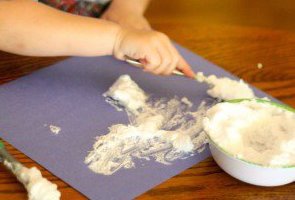
Directions

Place 1/2 cup of shaving cream and 1/2 cup of glue in a small bowl. Invite your child to mix the glue and shaving cream well. Once well mixed, encourage your child to spoon the mixture onto the construction paper and gently spread around the paper. Allow the mixture to dry.  It makes a nice 3-D picture.  

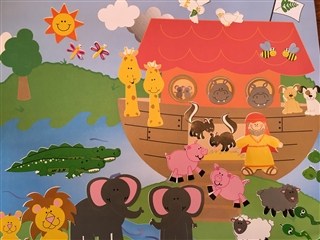
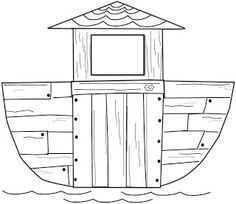
To make the clouds look like storm clouds as in the Bible story, Noah’s Ark, add a drop of black tempera paint.

Rubber Ducks – Matching Numerals with the Number of Dots

Rubber Ducks - Matching Numerals with the Number of Dots

Materials

Rubber Ducks that have numerals and dots on the bottom
Plastic container of water or bath tub

Directions

Fill a large plastic tub with water.  Place ducks in the water.  Depending on the age of your child, you may want to start with just a few ducks and then add more as your child is feeling more confident.  In this activity, your child may match numeral to numeral, numeral to the corresponding number of dots, count dots, or place ducks in numerical order. Each one of you can choose a duck and have your child determine which is the higher number. You can also make up addition or subtraction problems using the ducks.

There are lots of great math games you can play while playing with the rubber ducks!

Noah’s Ark Sticker Collage

Noah's Ark Sticker Collage

Materials

Children’s Bible with the story of Noah
Brown Construction Paper
Blue Construction Paper
Animal Stickers
Simple Ark Template
Glue stick

DirectionsNoah's Ark Sticker Collage

Read the story of Noah to your child. Using a simple ark template, cut out an ark shape from the brown construction paper and ask your child to help glue it onto blue construction paper. Next, invite your child to place animal stickers on the ark two by two. Name the animals. Count the animals.

Retell the story.

Here’s a Noah’s Ark sticker scene available through Oriental Trading Company:
Noah’s Ark Sticker Scene

Noah’s Ark Animal Cracker Activity and Snack

Materials

Children’s Bible with the story of Noah
Brown Construction Paper
Blue Construction Paper
Animal Crackers
Simple Ark Template
Glue stick

Directions

Read the story of Noah to your child. Using a simple ark template, cut out an ark shape from the brown construction paper and ask your child to help glue it onto blue construction paper. Next, invite your child to place pairs of animal crackers on the ark two by two. Name the animals. Count the animals.
Retell the story while your child enjoys eating the animal crackers as a special snack.

Stretching Rubber Bands

Stretching Rubber Bands

Materials

Variety of rubber bands in a small bowl
Plastic bottle (i.e. glue bottle, Voss water bottle, lotion bottle, etc.)

Directions

Invite your child to choose one rubber band at a time to stretch and place over and around the bottle. Allow your child to place as many rubber bands as interested onto the bottle.

This activity helps to stengthen the fingers and supports eye/hand coordination.

Sorting Pegs

Sorting Pegs

Materials

Various colors of pegs or any objects suitable for sorting (i.e. pompoms, fish crackers, coins, etc.)
Tray or defined workspace for sorting

Directions

Explain to your child that he will be making piles of objects that are the same. You may want to help get him started, and then step back and let your child lead the way. Once your child understands the concept of sorting, encourage him to find other ways to sort the common household objects.  For example, if sorting coins, see if you child sort them by size or color. Sort laundry by articles of clothing – socks, pants, shirts or by family members – mommy’s clothes, daddy’s clothes, brother’s clothes.  

Common everyday activities that involve sorting are important beginning concepts of children developing math skills. Children continue sorting and classifying by organizing their understanding of language, people and objects in their environment.

Exploring with Magnets

Exploring with Magnets

Materials

Magnets
Variety of metal materials
Workspace

Directions

Set out a variety of magnets and metal objects. Invite your child to explore with the magnets.  Do all the metals stick to the magnets? What is non-metal objects are added? Do wood or plastic objects stick to the magnets? It’s fun to make a paperclip chain by sticking the first paper clip to the magnet and addind on to make a long chain.  How many paperclips can be added?

Button Sorting

Button Sorting

Materials

Variety of buttons in different colors and sizes
Defining workspace – (i.e. hand towel, piece of paper, small bowls, tray with sections)

Directions

Place a variety of buttons in a small container or on a tray.  Invite your child to sort the buttons into groups by their color.  Count the buttons in each group.  Ask, “Which group has the most?”

For preschool age children, encourage the children to write the number of buttons for each color.  Make a graph with the colors of each of the button groups.  Encourge your preschooler to color in one square per button.  Ask, “Which one shows the most ?”, “Which one has the least?” “How many more red buttons are there than blue buttons?”

Ask you preschooler if he can find a differet way to sort the buttons (i.e. size, how many holes, etc.)

Grilled Cheese Sandwiches

Ingredients

White bread
Butter
American cheese slices
Griddle
Pastry brush

Directions

Grilled Cheese Sandwiches
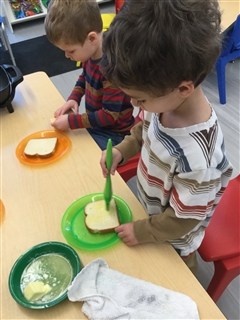
Melt 2 tablespoons of butter in a small dish. Place two slices of bread on a plate and invite your child to use a clean pastry brush to brush butter onto the bread. Have an adult place the bread, butter-side down on a hot griddle.  Place one piece of American cheese on top of the bread. Place the other piece of bread on top of the cheese, butter-side facing up.  Cook on low/medium heat allowing the cheese to melt and the bread to turn golden brown.  Flip to toast both sides of the sandwich. Remove from heat once both sides of the sandwich are golden brown. Cut into quarters and enjoy as a tasty snack or delicious lunch.

Sorting and Matching Candy Conversation Hearts

Sorting and Matching Candy Conversation Hearts

Materials

Construction Paper in the colors of candy Conversation Hearts
Candy Conversation Hearts
Glue

Directions

Cut out one color construction paper heart for each color of candy heart.  Glue all hearts onto a larger piece of construction paper. Place about 20 conversation hearts in a small bowl. Invite your child to take one heart out of the bowl at a time and place it on the correct color paper heart.  Once all the hearts have been sorted, ask your child to count how many hearts there are on each paper heart.  What color heart has the most?  What color heart has the least?

Lesson Extensions:
Young Toddlers:

  • Simplify activity by only having two different color hearts in the bowl and two hearts cut out of construction paper

Preschool:  

  • After sorting the hearts, encourage your child to make addition and subtraction problems with the hearts (i.e. 4 green hearts and 2 pink hearts = 6 hearts)
  • Create patterns with the colored hearts
  • Line the hearts up 2 by 2 and practice counting by 2’s
  • Make groups of 10 with candy hearts and practice counting by 10’s.  Can you count to 100 by 10’s?