by Mildred E. Cawlfield
When new babies arrive, they usually already know how to eat and sleep. They let us know when they’re hungry and when they are full. Parents learn to listen to know when the cry means hunger or some other need. They gradually help the baby get into a predictable schedule. A new baby will often go to sleep soon after starting a feeding. In that case, the parent can try to waken the baby by gently washing his face with cool water on a soft cloth or cotton swab.
Eating problems can start after the first couple of months if the parent tries to get the baby to take a little more after he is full, by jiggling the nipple in his mouth or by moving him around and trying to burp him frequently. If a bottle-fed baby is taking only two or three ounces every two hours, there is a need to lengthen the time between feedings and increase the amount of formula. If the baby drains a four-ounce bottle, more should be offered at the feeding and the times between feedings will lengthen.
A nursing baby as he grows and gets hungrier will increase the amount of mother’s milk by having days of wanting to eat more frequently. If the mother understands this and feeds him more frequently, the supply is increased and the baby goes back to longer stretches between feedings.
The parent shouldn’t take away from the child the major responsibility for eating, by trying to get him to eat more than he wants. If the child turns his head away or indicates he doesn’t want to eat, he shouldn’t be forced or tricked into eating. This leads to resistance and lack of trust.
Sleeping problems can start if the parents take away from the baby the responsibility for going to sleep by making themselves a part of the going-to-sleep process. If a child is accustomed to having the parent give a bottle or nurse, rock, or put a pacifier in his mouth in order to get to sleep, then he may be unable to return to sleep on his own when he awakens in the night.
An older baby is capable of getting enough food during the day. Awakening in the night for food to get back to sleep is merely a habit.
If parents have already made themselves part of the going-to-sleep process, and a baby of six or seven months or older is awakening in the night, it will take some fortitude to help the child learn to go to sleep alone, but it can be accomplished in less than a week. Put the baby down after a little routine, such as a song or prayer, and gently pat him down. Then leave the room. If he cries, which he will probably do, return after a few minutes and put him down again with a reassuring pat, and leave again. Lengthen the time of returning up to fifteen minutes between visits, but be sure not to stay with the baby until he falls asleep. If you give in and hold or feed the baby until he is asleep, you will have to start the learning process again. You can support the process with your prayers, and be assured that the crying periods will quickly shorten. The baby will soon learn how to get to sleep alone, and you will no longer be needed in the night to get him back to sleep. He will happily exercise his responsibility in that area.
Regular toilet training doesn’t start until a child is around two years old. However, a parent may put a baby on a little potty seat on the toilet for bowel movements from as early as ten or eleven months, if the child is regular and shows some indication when starting to have a movement. This can be easier than changing a diaper, and if the baby is not pressured it can be a happy lead-in to regular toilet training. The parent should stay with a child when he is on the potty, talk or read books, and acknowledge when elimination occurs. No disappointment or indication of failure should be voiced if the movements are missed. This procedure may need to be dropped for periods when there seems to be no regularity, but can be picked up again when regularity returns. The responsibility will be the parents until the child is around two and ready for urine training. But if these daily potty stops are a time of enjoyable attention from the parent and are successful, cooperation is more likely and natural later for regular toilet training.
These tips can prevent later problems in the areas of eating, sleeping, and toilet training. An important consideration, however, is to maintain a calm, matter-of-fact attitude about natural functions.
It is necessary to demand that the will of Principle, not person, be done, and to see that all training tends in this direction. (E.A.P. p. 14)

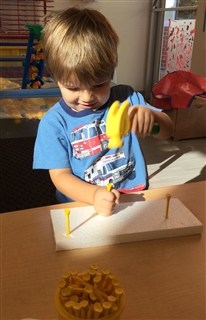
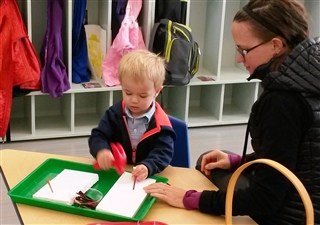 Place a thick block of Styrofoam or a garden kneeling pad, a container of plastic golf tees, and a child’s play hammer onto a hard surface. Invite your child to hammer the “plastic nails” into the Styrofoam. Encourage her to hold the tee with her fingers of one hand and use the hammer with the other hand. Your child will have fun pounding the tees into the foam.