Roller Painting

roller

Materials

Small Paint rollers
Tempera Paint
Large Paper to cover table top
Masking Tape
Tray for paint

Directions

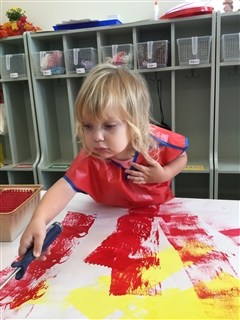
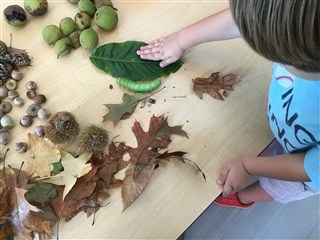
Cover table top with butcher paper or large paper.  Secure with tape.  Place 1-2 rollers in tempera paint that has been poured onto a tray. Invite your child to roll the paint roller through the paint and then onto the paper. If two primary colors are chosen, it’s a fun way to teach secondary colors.  Use fall colors and glue a nature collection onto the painted mural. 

Sorting and Ordering: Autumn Leaves

leaves

Materials

8-10 different-sized leaves
12″x18″ construction paper
Glue

Directions

Take a nature hike with your child at a local park or in your backyard and gather a variety of leaves that are different in size and shape.  Once home, spread the leaves around your work table.  Point out different sizes and shapes.  Invite your child to put leaves in piles of small, medium, and large.   Using the construction paper as a work mat, ask your child to choose 4-5 leaves to put in order from smallest to largest, working from left to right.  Once the leaves are in the right order according to their size, ask your child to put small drops of glue on the backs of the leaves and glue them down onto the paper in the same order from smallest to largest.  Allow time for the glue to dry before displaying.

Sorting Nature Collection

nature

Materials

Bucket or bag

Directions

Take a nature hike with your cihild at a local park or in your backyard and gather a variety of leaves, acorns, nuts, etc. that are different in size and shape. Once home, spread the collection around on your work table. Point out different sizes and shapes. Invite your child to put things in piles – acorns, leaves, sticks, etc. Talk about the different characteristics.

Lesson Extensions

  • Count each pile.  What is the largest collection?  What was the least amount collected?
  • Make patterns with the nature materials
  • Make a nature collage once you’re done exploring all the nature items

Yellow Chicks

chick

Materials

chickWhite construction paper
Yellow tempera paint
Shower scrunchie
Googlie eyes
Elmer’s Glue
Black Sharpie marker
Small orange piece of construction paper or carft foam to make a beak
Paper plate

Directions

Place 9×12 white construction paper onto the table surface. Pour yellow paint onto the paper plate. Invite your child to dip the shower scrunchie into the yellow paint and dab onto the center of the onstruction paper. Ask yoour child to choose two googly eyes to glue onto the yellow paint and a small orange triangle for the beak. With a Sharpie marker, draw two legs.

Dry completely before hanging.

Mini Banana Chocolate Chip Muffins

Ingredients

1 box of Banana Nut Muffin Mix
2 ripe bananas
3/4 cup mini chocolate chips
oil 
eggs

Directions

Follow the recipe on the muffin mix as directed.  Invite child to mash 2 ripe bananas and add them to the muffin mix.  Stir with a spoon.  Stir in 1/2 – 3/4 cup of mini chocolate chips.  Drop by small spoonfuls into the muffin tin.  Bake 8-10 minutes or until done in the middle.

The children loved helping to make the muffins, cracking the eggs, pouring the oil, stirring and mixing, pouring in the chocolate chips, then spooning the batter into the muffin tins.  They also loved eating them!  The recipe made 48 mini muffins.

Pinching Clothes Pins – Excellent Fine Motor Activity

Materials

Mini clothes pins
Basket of plastic cup

Directions

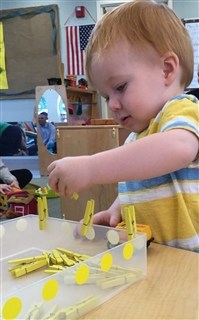
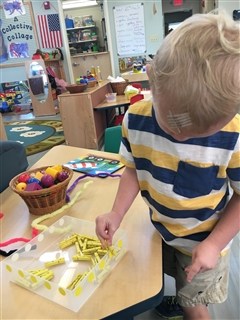
Place mini clothes pins in a basket or plastic cup.  Invite your child to pinch the clothes pins and fasten them onto the edge of the basket or cup.

Extensions

Add colored tape to the clothes pins and around the basket.  Encourage your child to match the colors.  Colored dots can also work.

Write letters of numerals on the clothes pins and on sticky dots around the basket. Child matches letter to letter or upper case letter to lower case letter, or numeral to numeral 

Place simple pictures around the basket and child clips the letter on the picture that begins with the letter sound.

Making Macaroni and Cheese

How to make Macaroni

Materials

Box of macaroni and cheese
Pan with water

Directions

Follow the cooking directions on the box.  Allow your child to examine the macaroni before cooking it.  How does if look and feel?  Cook the macaroni.  Once the macaroni has been cooked and drained, place it in a bowl or cooled pan. Observe how the macaroni has changed. Does it look and feel differently? Invite your child to pour in the milk and cheese, and add the butter. Then encouarge him to mix it all together. Enjoy for lunch or as a tasty snack.

Fun with Dot Stickers

Materials

Avery Dot Stickers
Papers with large shapes, lines, letters, etc. drawn on them

Directions

Invite your child to choose a paper with a shape, line, or letter drawn on it. Give her a sheet of Avery dot stickers to peel off and place on the lines forming a shape, letter, or track lines and curves. Our youngest Acorn friends were invited to place dot stickers inside circle shapes.  This activity provides fine motor practice, eye/hand coordination, and supports identification of letters, shapes, and numerals.

Lesson Extensions

  • Count the dots inside the shapes
  • Encourage older children to create patterns using different colored dot stickers

Yummy Banana Muffins

Ingredients

1 cup sugar
1 egg
1/2 cup butter
1 cup mashed ripe bananas (2-3 bananas)
3 tablespoons milk
2 cups sifted flour
1 teaspoon baking powder
1/2 teaspoon baking soda

Instructions

  1. Preheat oven – 350 degrees. Cream sugar, egg, and butter together in large mixing bowl.
  2. Beat until fluffy.
  3. Combine bananas and milk in small bowl. Set aside.
  4. Sift dry ingredients together and stir by hand into creamed mixture, alternating dry ingredients with banana mixture until flour is moistened.
  5. Fill paper-lined muffin tins with batter. Bake for 15-20 minutes or until toothpick inserted in center comes out clean.

Makes 12-15 muffins.

Shower Puff Painting

shower

Materials

Shower Puff(s) 
Tempera paint
Paper plate or plastic lid
Large paper

Directions

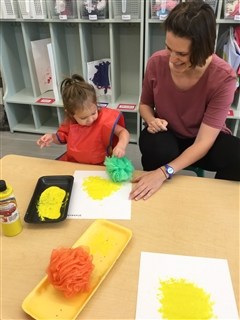
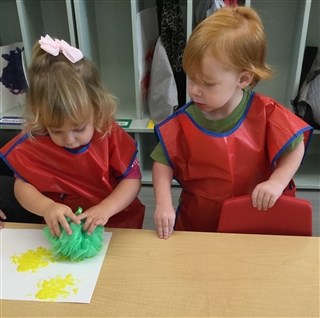
Pour a small amount of tempera paint onto paper plates or plastic lids. Invite your child to gently press the puff into the paint and then onto the paper. Your child will enjoy exploring with the shower puff and seeing what kind of prints they can make.  Allow your child to experiment and explore the sponge and the effects created with the paint on the paper. Let them choose the paint colors. 

Additional Suggestions

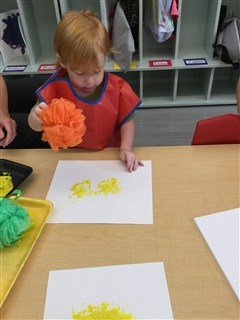
  • Extend the activity by emphasizing the different colors that are created as two colors mix, point out patterns and textures. Try using a few different type sponges to see what different effects can be created
  • Introduce new vocabulary and descriptive words like, “splotchy,” “swirly.” This will help language develop.
  • Ask questions to help connect their understanding and use vocabulary to give them words to describe what they’re creating, eg. “In one swipe across you can see blue, red and purple. Why do you think that is?” “I wonder why there are little bubbles there?” “Can you make the bubbles appear again?” etc.
  • Use the finished project as gift wrap
Children need to create and explore, and this activity is more about the process than the product.