Tickling Textures

Materials
Various objects with different textures (e.g. large feather, soft ribbons, cotton balls, cloth, tissues, etc.)

Directions
Place your baby on a blanket on the floor — or on her changing table or in her crib. Gently brush the objects across her tender tummy, leg, or cheek. Observe how your baby responds to the various objects. You will proably be able to tell which items are her favorites by her excited kicks and coos. Of course, what makes this game even more interesting are your comments, like, “Isn’t this soft?” “Does this tickle?”) This is an activity that can often be used to entertain your baby for months!  She may even start suggesting tickle-me items on her own by the time she’s about a year old!

Tickle time promotes body awareness and social development as well as tactile stimulation. It also gives you a chance to practice responding to your baby’s cues and body language.

Tweezing Walnuts

Materials
Walnuts in their shells
Small tongs
Tray

Directions
Place walnuts on a tray. Provide a pair of small tongs for your child and invite her to use the tongs to pick up the walnuts. This is a great fine motor activity and requires good eye/hand coordination, as well. 

Texture Bears

Materials
Construction paper cut into a simple bear shape
Various small pieces of materials with interesting textures (i.e. velvet, sandpaper, feathers, bubble wrap, satin ribbon, etc.)
Glue

Directions
Begin by reading a favorite teddy bear book.  Then invite your child to glue small pieces of material with various textures all over the bear shape.  Talk about the way each one feels as she glues them onto the paper.  Introduce words such as rough, bumpy, soft, smooth, etc.

Extensions

  • Take a texture walk around your house with your child; identify things that are smooth, bumpy, soft, rough
  • Sort items according to their textures
  • Read “Touch and Feel” books with your child

Bottle Roll – Dry Sensory Bottle (6 months and up)

Materials
8-ounce baby bottle (or any plastic bottle – Voss Water bottles are sturdy and work well)
Dried beans, rice, un-popped popcorn, beads, buttons, googly eyes, etc.
Hot glue gun

Directions
Fill bottle about 3/4 full with dry materials. Safely secure lid by using a hot glue gun.  

Place the bottle near your baby and show him how to roll it back and forth himself. He will love to watch, listen to, and chase after the rolling bottles!  If your baby follows the rolling bottle, he will be practicing his crawling.  If he decided to sit and roll the bottle back and forth using his hand, he will be working on his fine motor skills and eye-hand coordination. 

Bubbles for Baby

Ingredients
1 cup water
1 teaspoon of glycerin (available in pharmacies)
2 tablespoons Dawn liquid dish detergent

Directions
Gently mix all ingredients together.  For best results, let sit for a few hours.

(Make bubble wands from pipe cleaners, plastic lids with the center cut out, or purchase)

Blowing bubbles in the bath tub contains the soapy residue that some bubbles leave on the floor and makes bath time more fun. A cascade of bubbles during diaper-changing time makes a pleasant distraction. Watching bubbles float through the air helps your baby practice visual skills such as eye tracking, distance, and depth perception. Trying to swat at them is excellent practice for her budding eye-hand coordination. And if she should actually catch one, she’ll learn a lesson in the relationship between cause (I touch the bubble) and effect (the bubble pops!)

Teaching Young Children about Gratitude

By Dorothy Halverson, Director of Acorn Programs

“Gratitude is much more than a verbal expression of thanks. Action expresses more gratitude that speech.” 
Science and Health with Key to the Scriptures, p. 3
 

Gratitude is one of the most important concepts to teach children. By learning gratitude, children become sensitive to the feelings of others, developing empathy and other life skills along the way. Grateful children look outside their one-person universe and understand that their parents and other people do things for them (e.g. prepare dinner, give hugs, buy clothing and toys). Indeed, instilling grateful feelings early will benefit your child later in life. 

Children as young as 15 to 18 months can begin to grasp concepts that lead to gratitude. They start to understand that they are dependent; that mommy and daddy do things for them. In other words, toddlers comprehend that they are separate beings from their parents, and that mommy and daddy often perform actions to make them happy, like playing peek-a-boo, even if they can’t yet articulate their appreciation. 

By age 2 or 3, children can talk about being thankful for specific objects, pets, and people. It is helpful to take time at the dinner table or at bedtime for everyone to express gratitude about their day. Toddlers just learning to talk can participate in this activity, especially as it is modeled for them each day. 

By age 4, children can understand being thankful not only for material things like toys but for acts of kindness, love, and caring. 

Gratitude is most easily taught through daily conversations and modeling. Children model their parents, so lead by example and use “please” and “thank you” when you talk to them. You might say, “Thanks for that hug — it made me feel really happy!” Insist on their using the words, too. After all, “good manners and gratitude overlap.”  

Ideas for teaching gratitude: 

  • Work gratitude into your daily conversation. Try to weave appreciation into your everyday talk — “Aren’t the colors in the sunset beautiful?” “I’m so happy when you listen!” Take time to reflect together each day, sharing all the good that happened. 
  • Give children responsibilities. Allow children to feel a part of the home by helping care for it. By participating in simple household chores like feeding the dog, stacking dirty dishes on the counter, and taking the folded laundry to each family member’s room, children realize the importance of lending a helping hand. 
  • Find a goodwill project. Research ways children can actively participate in helping someone else, even if it’s as simple as making cookies for a neighbor. As you’re stirring the batter or adding sprinkles, talk about how you’re making them for a special person, and how happy the recipient will be. 
  • Encourage generosity. Donate toys and clothing to charitable organizations. Children are often inspired when they see you giving to those in need, so spend time together going through your child’s closet to find something special to give to another child in need. 
  • Write thank-you notes. Toddlers’ cards might just be scribbles or stickers, but then attach your own words of thanks. As children grow, the scribbles become drawings, then longer letters. Younger children can even dictate the letter while you write. Just the act of saying out loud why your child loved the gift will make him feel more grateful. 
  • Practice saying no. Of course, children ask for toys, video games, and candy, and when every whim is granted, it can be difficult to feel grateful. Saying “No” on a regular basis helps diminish the feeling of entitlement and allows children to work through disappointment. 
  • Create a gratitude journal. Each day have your child list one thing that makes her feel grateful. This will help your child focus on all the good that unfolded during the day. 
  • Be patient. Gratitude requires weeks, months, even years of reinforcement. Be patient and know that from gratitude flows joy!

Teddy Bear Toast

Ingredients

  • 2 slices Sandwich Bread
  • 4 tablespoons peanut butter
  • 1 banana, sliced
  • 6 blueberries
Directions
Place the bread slices in a toaster and toast until golden brown. Spread 2 tablespoons of peanut butter onto each piece of toast and shape into 1 large circle for the teddy bear face and 2 smaller circles for the teddy bear ears. Place a banana slice in the center of each small circle to make ears, and one banana slice in the center of the large circle to make a mouth. Place 2 blueberries above the center banana slice to make eyes, and 1 blueberry on top of the center banana slice. Enjoy! Our Acorn friends enjoyed teddy bear toast as a special snack.

Traveling with Baby

At a recent parent seminar, parents shared tips on traveling with infants. The parents have found that, for the most part, car trips with a baby go well. They’re often surprised to find that infants can travel happily even though confined to a car seat on long trips. Infants enjoy the closeness of family members and the movement of the car. 

Here were some pointers offered: 

  • A car seat padded with a head support and strap covers can add to the comfort of a young infant. 
  • Making frequent stops is helpful. A dad commented that he had been used to driving in long shifts, but when he re-geared his thinking to making more frequent stops for the baby, he found it enjoyable. The baby introduced them to fellow travelers, who came over to admire the tiny infant and started conversations. 
  • Places for changing diapers were improvised. A changing pad in the back of the car or back (with the car stopped!) worked well for one family. Some parents also used the back seat for feeding baby. 
  • Extra equipment needed for babies (e.g. stroller, diapers, extra food and clothing) fill up a car, but parents found that planning ahead and having the needed equipment and supplies made for a smoother trip. 
  • Nursing moms find feeding baby during travel is easy. Parents of bottle babies can check ahead and make sure the type of formula they’re using is available at their destination to eliminate the need to bring a large supply. 
  • Taking some good toys is a must, as babies become avid explorers of objects. Some new little items to hold and mouth will keep baby busy. Items from the house, such as an empty wipes container, or toys with moving parts will appeal. Look for ways to make the toys available for baby. Attach dangling toys to the handle of the car carrier. A busy surprise box with pop-up figures is usually worth the space it takes for a baby over ten months old. 
  • Don’t forget board books, singing with your child, and children’s music.

Chocolate No-Cook Play Dough

Ingredients

1 1/2 cups of flour
1/2 cup cocoa powder
1/2 cup salt
tablespoon of oil
1 cup warm water approx

Directions


Invite your child to help measure and stir the dry ingredients together first. Pour in oil and warm water.  Stir some more until it makes a dough.  Dump the playdough onto a hard surface and with the help of your little one, knead the dough until it is smooth. Add more water if it is crumbly, add a little more flour if it is too sticky.  

Remind your cihild not to eat the playdough!  It smells so good!

Fine Motor Extension:  Provide uncooked spaghetti and Cheerios  (we used chocolate Cheerios!) and invite your child to stick pieces of spaghetti into a ball of playdough and then thread Cheerios onto it.

Dissolving Teddy Bears

Materials
Teddy Grahams
Milk
Bowl
Spoon
Timer or stopwatch (optional)

Directions
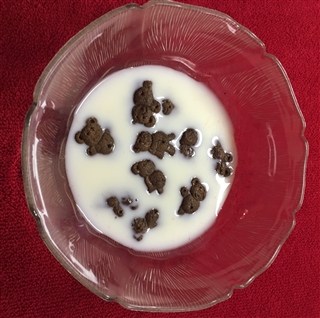
Toddlers will just have fun watching the teddy grahams dissolve in the milk.  You will want to expose them to new words like: dissolved, mushy, absorb, and introduce them to a stopwatch, if you decide to use one. 
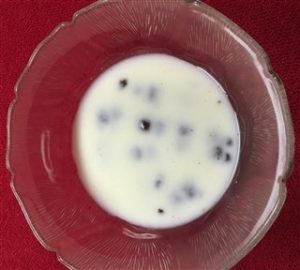
For preschool age children, you may want to expand the learning and include making predictions, describing observations, and talking about who came the closest with their prediction?  Check out this website for more ideas.

Have fun!