Pompom Play (0-3 months)

A Touch and Sight Game (0-3 months)

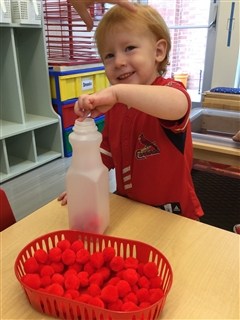
Gather together some large brightly colored pompoms or small plush toys. Get the baby’s attention by holding the toy twelve to fifteen inches above his face. Slowly move the object from side to side, keeping pace with his ability to track the object with his eyes. Try slowing lifting the object up and down so he can watch it move from near to far. Watching a brightly colored object move from side to side and up and down helps your baby focus and track objects at various distances.

Touch the toy to his stomach or use it to stroke his face and arms. Feeling the pom poms gently touch his stomach, face, or arms, lets him explore new textures.

Remember to never leave small objects around a baby. 

Pom Pom Drop


Materials
1 empty plastic bottle (Voss water bottles work well!)     
Pom Poms
Small bowl or basket

Directions
Place 10 – 12 pom poms into a small plastic bowl or basket. We used red pom poms only during Red week. Provide an empty plastic bottle. Invite your child to pick up one pom pom at a time using her pincer grasp (thumb and index finger) and drop the pom pom into the plastic bottle. Continue until your child loses interest. Pour the pom poms out and count them together before placing them back into the bowl or basket.

This activity helps stengthen the pincer grasp which is needed for writing, practices eye and hand coordination, and one-to-one correspondence as you count the pom poms.

Tiddlywinks in a Zip-Loc

Materials

Various colors of transparent tiddlywinks
2-gallon Zip-Loc bag
Water

Directions

Place colorful tiddlywinks in a 2-gallon Zip-Loc baggie. Add a small amount of water (1/4 – 1/3 cup of water). Zip the bag closed and lay it on a light table or table surface. Invite your child to explore the baggie using his fingers – moving the tiddlywinks around. What happens when two colors land on top of each other? How does the color change?

Toaster Tongs and Pom Poms

Girl making art

Materials:
Toaster Tongs
Container with Pom Poms
Ice Cube Tray

Activity:
Using a small pair of tongs (e.g. toaster tongs), pick up one pom pom from the container and transfer it to a section in the ice cube tray.  Continue until each section of the ice cube tray is filled with a pom pom. 

Great fine motor practice!

Principia School Acorn Program

Pom Poms and Pool Noodles

Painting artwork

Materials:

1 pool noodle
1 small bowl or container of pom poms
1 pair of plastic tongs or toaster tongs

Directions:

With a sharp knife, cut the pool noodle into sections approximately an inch in thickness.  Lay them out onto a flat surface.  Provide a small bowl or container with pom poms and a pair of tongs.  Invite your child to use the tongs to transfer the pom poms to the holes in the pool noodles, one pom pom at a time. 

By placing the bowl on the left side of the work space and the noodles on the right side, your child will be practicing moving their eyes and hand from left to right, which supports preparation for reading and writing.

Bubble Wrap Printing

Bubble wrap printing

Materials
Bubble wrap cut to the size of paper (9×12)
Purple tempera paint in a small container
Sponge paint brush
9×12 white construction paper
Tape

Directions
Tape bubble wrap to the table’s surface.  Using the sponge paint brush, cover bubble wrap with purple paint.  Press paper on top of the bubble wrap.  Lift paper and dry flat.

Marshmallow Painting

Marshmallow Painting

Materials

1 paper plate
Large marshmallows
Various tempera paint colors
Large piece of construction paper

Directions

Marshmallow Painting
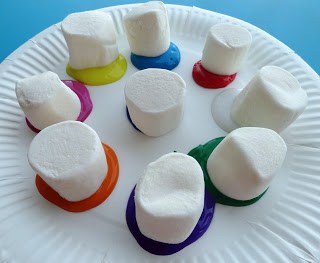
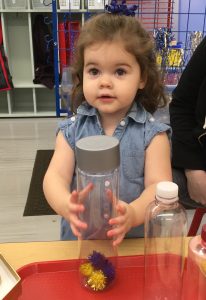
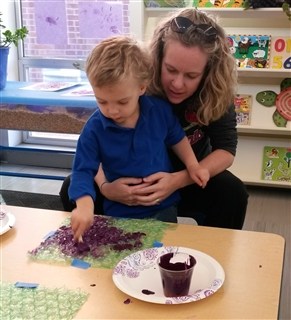
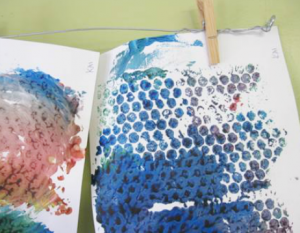
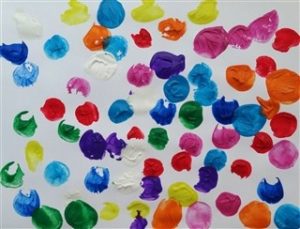
Place a small blob of each color paint onto the paper plate. Place a marshmallow in each color paint. Invite your child to use each marshmallow to make dot prints onto the construction paper. Dry completely and then display.

Paper Windsocks

Paper Windsocks

Because it is polk-a-dot week, we decided to decorate our windsocks with colors dots, but you can invite your child to decorate his windsock any way he chooses.

MaterialsPaper Windsocks

12×18 construction paper
Ink daubers in various colors
Paper streamers (Dollar Tree store)
Tape or glue stick
Scissors
Yarn
Hole punch
Stapler

Directions

Invite your child to decorate one side of the construction paper using the ink daubers (or markers).  Turn the paper over and glue or taper paper streams to the bottom of the paper.  Streamers should hang down and be approximately 2 feet long. Once the streamers are secure, roll the paper into a cylinder shape and staple or tape ends together. Use a hold punch to make 4 holes at the top and string two pieces of yarn through the holes, having them cross in the center. Tie at the top. Hang it in a breezy, dry area, or invite your child to take it outside to run with it.  

Making Polka-dot Crowns

Making Polka-dot Crowns

Materials

12×18 Construction paper in an assortment of colors
Avery Dot Stickers
Stapler

Directions

Cut the construction paper down to be about 8×18 in size. Invite your child to place colorful dot stickers all over the construction paper. Once your child has placed all the stickers that he wants to do on the paper, measure the paper around your child’s head to fit the crown snuggly on his head.  Staple the ends together. Your child will enjoy wearing the crown for the day!